Smelly dryers are often caused by trapped moisture, lint buildup, or odors from laundry detergents and fabrics. A clean, odor-free dryer not only smells better but also operates more efficiently and reduces the risk of fire. This guide walks through practical steps, using common tools and proven methods suitable for most American homes.
Quick Answer
Run a thorough lint screen and duct cleaning, remove and wash drum and seals, deodorize with enzyme-based solutions, and maintain regular cleaning with a simple schedule. If odors persist after cleaning or you notice heat or electrical issues, pause use and seek professional help.
What You’ll Need
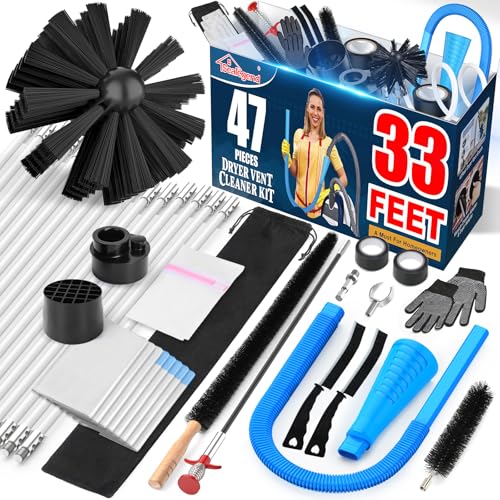
- Dryer vent cleaning kit with brush and 25ft vent hose
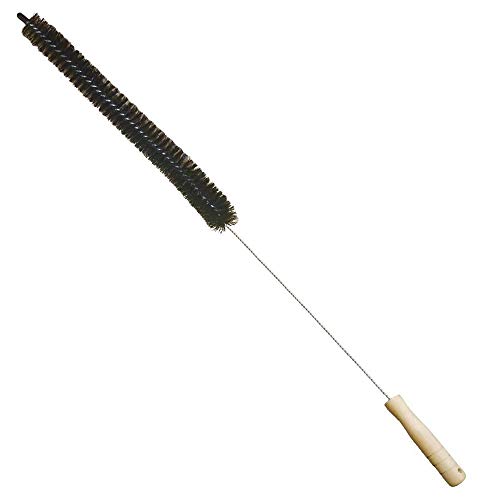
- Flexible lint brush for dryer vent cleaning
- Dryer vent auger snake tool 25 ft
- Ergonomic handheld vacuum for dryer lint removal
- Dryer deodorizing cleaning kit with enzyme odor eliminator for appliances

Before You Start
Before beginning, unplug the dryer and disconnect the vent from the back of the unit. Move the appliance away from the wall to access the exhaust vent and the interior drum. Wear a mask and eye protection if you plan to use solvents or compressed air. Prepare adequate space to collect lint and debris. Expect to spend 45–90 minutes for a thorough job, depending on vent length and accessibility.
Step-By-Step: How To Clean A Dryer That Smells
- Remove and clean the lint screen. Wipe with a damp cloth to remove residual fibers and detergent residue. Let it dry completely before reusing.
- Clean the interior drum and seals. Wipe the drum thoroughly with a mild, non-abrasive cleaner. Inspect the door seal for cracks or build-up and wipe clean.
- Clear the lint trap housing. Use a flexible lint brush to remove lint from inside the housing and around the lint screen well. Vacuum the area to capture any fine dust.
- Clean the vent duct. Attach the vent cleaning kit brush to the long rod and gently feed it through the vent from the dryer opening toward the exterior vent. Use the 25 ft hose to push and pull lint clog remnants out. Repeat from the exterior if needed.
- Use a vent auger if stubborn clogs remain. Insert the dryer vent auger snake tool and rotate to break up compacted lint. Pull back slowly to collect loosened debris.
- Vacuum and deodorize the entire area. Use the ergonomic handheld vacuum to pick up lint from around the cabinet, lint trap area, and behind the dryer. Apply the enzyme odor eliminator as directed on the appliance cleaning kit to neutralize residual smells.
- Reassemble and run a test cycle. Reconnect the vent, push the dryer back into place, and run a short, empty hot cycle to dry out the system and disperse any cleaning residues.
- Repeat maintenance every few months. Regular cleaning reduces odor buildup and improves dryer efficiency.
Troubleshooting
| Symptom | Likely Cause | Fix | Prevention |
|---|---|---|---|
| Smell persists after cleaning | Moisture buildup or residual detergent odors | Re-clean drum and vents; use enzyme-based deodorizer | Keep laundry from sitting damp; use less residual detergents |
| Dryer runs hot or stops | Vent blockage or lint buildup | Deep clean vent with brush, hose, and auger | Clean vent quarterly; avoid overloading |
| Lint accumulates quickly | Clogged vent or damaged seals | Inspect and replace seals; ensure vent is clear | Regular lint removal after every few loads |
| Unusual noises during cleaning | Debris in drum or belt wear | Remove loose objects; consult pro if noise continues | Inspect for loose items in pockets |
Common Mistakes
- Skipping the exterior vent cleaning and focusing only on the drum
- Using overly harsh cleaners that leave residues inside the drum
- Neglecting to unplug and disconnect venting during work
- Rushing through the vent cleaning steps without thoroughly following the hose length
Taking time to clean comprehensively helps prevent recurring odors and keeps the machine running efficiently.
Tips For Best Results
- Schedule regular dryer vent maintenance every 6–12 months, depending on usage and lint production
- Use a deodorizing kit with enzyme odor eliminator to break down organic residues that cause smells
- Keep the laundry area dry and well-ventilated to minimize damp odors
- Run a test cycle with a small load to confirm odor elimination and airflow
Call A Professional
If there is persistent odor after a thorough cleaning, if you notice any burning smell, unusual heat, or signs of a gas appliance issue, stop using the dryer and contact a qualified appliance technician or licensed HVAC professional. Fire risk, electrical hazards, and gas leaks require expert assessment.
FAQ
How often should I clean my dryer’s vent?
Most homes benefit from cleaning every 6–12 months, but higher usage or long duct runs may require more frequent maintenance.
Can enzyme odor eliminators damage my appliance?
When used according to the product directions, enzyme-based cleaners are safe for appliances and effective at neutralizing odors.
Is a flexible lint brush better than a rigid one?
Flexible brushes reach curved ducts more easily and can reduce the effort required to clear lint buildup.
What about odors from damp clothes?
Ensure clothes are fully dried before storage and consider using a deodorizing kit that targets moisture-related smells.
Buying Guide
Choosing the right cleaning tools and deodorizers can make dryer maintenance easier and more effective. Consider these factors to compare options and select the best kit for your needs:
- Size and duct compatibility: Ensure the vent cleaning kit and hoses fit your dryer vent length and diameter, especially for long or multiple-turn ducts.
- Tool versatility: A combination of brush attachments, an auger, and an ergonomic handheld vacuum helps tackle both minor and stubborn clogs.
- Odor control: Enzyme-based cleaners offer natural odor elimination without harsh chemical scents.
- Ease of use: Look for user-friendly kits with straightforward assembly and clear instructions for safe operation.
- Dust and lint containment: A kit with a wide reach and strong capture capability reduces mess and exposure to allergens.
- Compatibility with detergents: If the cleaning plan includes detergent exposure, choose gentle, residue-free formulas.
- Maintenance schedule support: Some kits come with maintenance tips or reminders that help sustain performance between cleanings.
In practice, pairing a dryer vent cleaning kit with a flexible lint brush, a vent auger snake, and an ergonomic vacuum provides a comprehensive approach. A dedicated deodorizing kit complements the cleaning routine by neutralizing odors rather than masking them. Regular use of these tools supports safer operation, better airflow, and a fresher laundry environment.