Anyone who spends time outdoors knows a cooler helps keep perishables cold, but lingering odors can ruin the experience. With a practical cleaning routine and the right tools, a stinky cooler can return to smelling fresh and ready for the next trip. This guide provides step-by-step methods, using common household items and a few targeted cleaning products to tackle stubborn smells.
Quick Answer
Rinse the cooler, scrub with a baking soda or vinegar solution, dry completely, and seal in fresh odor absorbers. For persistent odors, use an odor absorber gel for cooler and a dedicated brush kit to scrub interior corners.
What You’ll Need
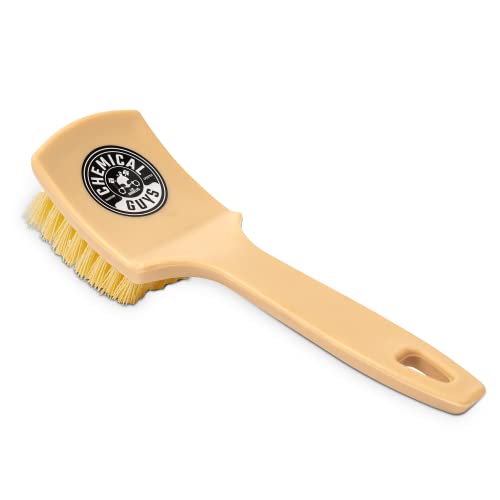
- Cooler cleaning brush plastic bristle kit
- Ice chest interior scrub brush
- Baking soda deodorizer for cooler
- Odor absorber gel for cooler
- Camping cooler cleaning sponge set


Before You Start
Ensure the cooler is empty and all detachable parts are removed. Rinse with warm water to loosen grime. Work in a well-ventilated area to avoid inhaling strong odors from cleaners. Critical cautions: do not mix bleach with ammonia, and never store food while odors linger. Time estimates: a quick clean takes 15–20 minutes; a deeper clean may take 30–45 minutes if odors are persistent.
Step-By-Step: How To Clean A Stinky Cooler
- Empty all contents and remove the drain plug if your cooler has one. Rinse with warm water to remove loose debris.
- Rinse and wipe the exterior. This prevents dirt from transferring to the interior during scrubbing.
- Prepare a cleaning solution: a 1:1 mix of water and white vinegar, or a paste of baking soda and water for tough smells.
- Use the ice chest interior scrub brush to scrub the walls, corners, and seals. Pay attention to the gasket and any folds where mold can hide.
- Rinse again to remove soap or baking soda residues. If odors persist, apply a thin layer of baking soda inside and let sit for 15–20 minutes before a final rinse.
- Dry the interior completely with a camping cooler cleaning sponge set, or towels. Leave the lid open to air-dry thoroughly.
- Apply an odor absorber gel for cooler to the interior or place it in a small container on the bottom. This helps neutralize remaining odors between uses.
- Store the cooler with the lid slightly ajar or with a breathable insert to maintain dryness and prevent new smells from forming.
- Rinse and replace any shelf or rack if needed. Reassemble and run a quick test by cooling a small amount of water to ensure seals function properly.
- If odors return, repeat the scrubbing with a dedicated cooler brush and consider a second treatment with the odor absorber gel for cooler for continued freshness.
- For best results, consider a long-term deodorizing routine between trips by sprinkling baking soda lightly on the bottom and sealing it in a breathable bag. Replace monthly or as odors persist.
Troubleshooting
| Symptom | Likely Cause | Fix | Prevention |
|---|---|---|---|
| Persistent sour smell even after cleaning | Odor absorbed into plastics or gasket | Apply odor absorber gel for cooler; wipe gasket and seals thoroughly | Rinse after use; store with lid ajar to air out |
| Musty odor returning within days | Moisture trapped inside | Dry interior completely; consider silica gel sachets | Turn off lid seal between uses; dry after cleaning |
| Discoloration or staining | Food residue or spilled beverages | Scrub with baking soda paste; rinse thoroughly | Rinse after every use; wipe dry |
Common Mistakes
- Using abrasive cleaners that scratch interior plastic
- Leaving interior wet for extended periods, promoting mold growth
- Ignoring the gasket and hinges where odors linger
- Relying on air fresheners instead of removing the source odor
Tip: Always finish with a thorough dry and apply a light layer of baking soda if you plan long-term storage before your next trip.
Tips For Best Results
- Combine baking soda deodorizer for cooler with a splash of white vinegar for a deeper clean on tough odors.
- Use the cooler cleaning brush plastic bristle kit to reach tight seams and the drain channel.
- Place odor absorber gel for cooler in the bottom compartment to trap odors without staining food items.
- Regular upkeep between trips prevents heavy buildup and extends the life of interior surfaces.
Call A Professional
Seek professional help if the cooler shows persistent mold growth that affects the integrity of the plastic or if the gasket is severely warped. Strong chemical odors that linger after repeated cleaning may warrant inspection or replacement of parts by a specialist.
FAQ
What is the best cleaner for a stinky cooler?
A simple white vinegar solution or a baking soda paste is effective for most odors; follow with a thorough rinse and dry.
Can I use bleach in a cooler?
Bleach is generally not recommended for plastic coolers that hold food due to residue and taste concerns.
How often should I clean my cooler?
Clean after each trip, and do a deep clean monthly if used frequently.
Is it safe to store food with deodorizing products inside?
Do not store food with odor absorbers or gels; place them nearby but away from stored items.
Buying Guide
When choosing a cooler cleaning setup, consider how often you travel, the size of the cooler, and how accessible the interior is for scrubbing. Key buying factors include:
- Size and interior access: A larger cooler requires longer brushes and a broader scrub surface
- Brush quality: A dedicated cooler cleaning brush plastic bristle kit or ice chest interior scrub brush helps reach corners
- Deodorizing options: Odor absorber gel for cooler and baking soda deodorizer for cooler provide ongoing freshness
- Cleaning sponges: Camping cooler cleaning sponge set offers absorbent, quick-dry options
- Ease of use: Tools should be lightweight, dishwasher-safe where possible, and resistant to moisture
- Placement for storage: Consider how you’ll store cleaners and gels without contaminating food
- Durability and materials: Look for rust-proof handles and BPA-free plastics for safety
Are you planning frequent weekend trips or extended camping? A compact kit with a versatile brush, a baking soda deodorizer, and a small odor absorber can keep most coolers fresh with minimal effort. If you rely on a large cooler for family trips, investing in a robust cleaning brush kit and a couple of odor control products can save time and improve hygiene on the road. Always test cleaners on a small area first to prevent damage and ensure safety for food storage.