Cleaning air vents improves indoor air quality, helps HVAC systems run efficiently, and reduces dust buildup in living spaces. This guide provides practical, step-by-step instructions for American homeowners to clean supply and return vents using common tools and safety practices.
The following sections cover a quick overview, the tools you’ll need, safety considerations, detailed steps, troubleshooting tips, common mistakes, optimization ideas, when to call a professional, and a buyer’s guide for choosing vent-cleaning tools.
Quick Answer
To clean air vents effectively, start by removing vent covers, vacuuming loose dust, and using a brush or microfiber cloth to dislodge debris. Finish with a light wipe and reinstall. For stubborn buildup, use a flexible hose attachment or a portable blower to push dust out before vacuuming again.
What You’ll Need
The following tools and supplies are commonly used for vent cleaning. Gather these before you begin to streamline the process.
- Air vent cleaning brush with extension pole
- Duct vent cleaning brush set
- Vacuum crevice tool narrow nozzle for air vents
- Air vent grill cleaning tool microfiber cloth
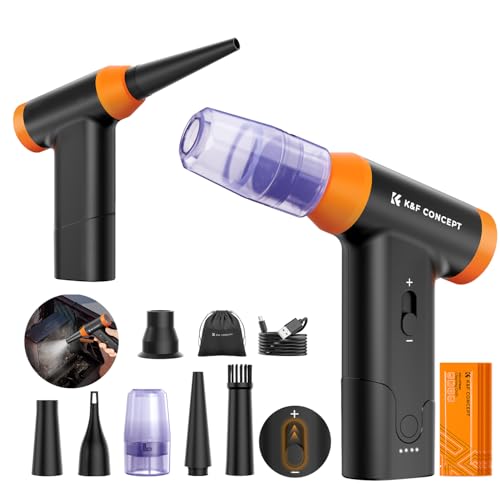
- Portable blower dust canister for HVAC vents


Before You Start
Prepare the workspace by turning off the HVAC system to prevent dust from circulating. Place a drop cloth under the vent and wear a microfiber mask to minimize inhalation of fine particles. Time estimate: 20–45 minutes per vent, depending on access and buildup. Important: Do not use excessive force on fragile vent grilles or sheet metal, and avoid wet cleaning on electrical components.
Step-By-Step: How To Clean Air Vents
- Power down the system and open the room vent covers to access the louvers.
- Vacuum the vent using the vacuum crevice tool narrow nozzle to remove loose dust from the vent interior.
- Loosen debris with an air vent cleaning brush with extension pole or duct vent cleaning brush set, working in a steady, sweeping motion.
- Wipe the grill with a microfiber cloth to capture remaining dust, rotating the cloth as needed for a thorough wipe.
- Dislodge stubborn buildup by inserting a flexible brush or using a portable blower dust canister to push debris toward the vacuum.
- Re-vacuum and inspect to ensure the path is clear. Reattach the vent cover, ensuring a snug fit to prevent air leaks.
- Repeat per vent for every supply and return vent in the area being cleaned.
- Check for airflow after reassembly by turning the system back on and feeling for consistent airflow at each vent.
- Clean surrounding areas to capture any dust that fell during the process, using a damp cloth if needed.
- Store tools in a dry place, ready for the next cleaning cycle.
- Document maintenance note the date and vents cleaned to maintain a schedule and monitor buildup over time.
- Optional deep clean consider removing ducts for a professional cleaning if significant mold, odor, or heavy buildup is present.
Troubleshooting
| Symptom | Likely Cause | Fix | Prevention |
|---|---|---|---|
| Weak airflow after cleaning | Blocked duct or return filter | Inspect ducts and replace filter; re-clean vent interiors | Replace filters on schedule; use higher MERV rating if appropriate |
| Persistent odor | Mold or mildew inside duct | Professional mold remediation if odor persists after cleaning | Keep area dry; ensure humidity control |
| Dust reappears quickly | Vent not fully sealed or additional dust source | Seal vent area; identify other dust sources | Regular cleaning cadence; clean surfaces around vents |
| Damage to vent fins | Rough brushing or force | Use softer brushes; avoid bending fins | Gentle cleaning; follow manufacturer guidance |
Common Mistakes
- Using water or liquids on electrical components or motors
- Trying to reach tight spaces with hard-force tools that bend or crack vent parts
- Neglecting to turn off the HVAC system before cleaning
- Skipping replacement of dirty filters, allowing re-circulation of dust
Tips For Best Results
For efficiency, combine tools to maximize dust removal. Start with a vacuum, then use a brush to loosen debris, followed by a microfiber wipe. Schedule ventilation cleaning seasonally or during heavy dust periods, such as after home renovation. If you have allergies, consider higher-efficiency filtration and more frequent cleanings.
Call A Professional
Consider professional inspection or cleaning if you notice mold growth, persistent odors, extensive duct contamination, or if any vent is difficult to access. Seek immediate help if you see damp insulation or suspect pest ingress. Some HVAC systems require specialized equipment and building codes adherence that trained technicians provide.
FAQ
How often should air vents be cleaned?
Most homes benefit from cleaning every 6–12 months, or more often if you have pets, allergies, or after renovations.
Can I clean air vents myself if I have pets?
Yes, but you may need to clean more frequently and use a high-efficiency vacuum and sensitive brushes to capture pet hair and dander.
What’s the best tool for hard-to-reach vents?
A flexible duct brush or extension pole with a soft-bristle brush works well for tight spaces.
Do I need to remove all ducts for a thorough cleaning?
Most homes do not require removal; a thorough cleaning of accessible vents and ducts typically suffices. Severe cases may need professional service.
Buying Guide
When selecting vent-cleaning tools, consider size, compatibility with your vents, and ease of use. Important factors include:
- Vent size and type: Choose brushes and extension tools that fit your register size and duct shapes.
- Cleanliness goals: Light maintenance vs. deep cleaning will guide tool selection such as microfiber cloths vs. heavy-duty brushes.
- Noise and ergonomics: Look for lightweight handles and low-noise brushes for comfortable use.
- Electric vs. manual tools: A portable blower can help with stubborn debris, while manual brushes suffice for routine cleaning.
- Filtration compatibility: Pair cleaning tools with proper vacuum attachments to maximize dust capture.
- <bPlacement considerations: Ensure tools fit closets, crawl spaces, and ceiling vents without obstruction.
Would you like help choosing a specific combo from the listed products? A quick comparison can clarify which tool set best fits your home and cleaning frequency.