Aluminum trailers offer durability and a lightweight profile, but their bright finish can dull with road grime, oxidation, and environmental buildup. This guide provides a practical, step-by-step approach to restore and maintain that gleaming surface using common tools and safe practices relevant to American users.
Quick Answer
Start with a gentle cleaning to remove loose dirt, then use a dedicated aluminum trailer cleaner and polishing system. For tough stains, apply an aluminum restoration polish and finish with a dual action polisher to achieve a smooth, uniform shine. Regular maintenance reduces corrosion and preserves the trailer’s aesthetic.
What You’ll Need
- Aluminum trailer cleaner kit
- Aluminum trailer polish compound
- Dual action polisher for aluminum trailer
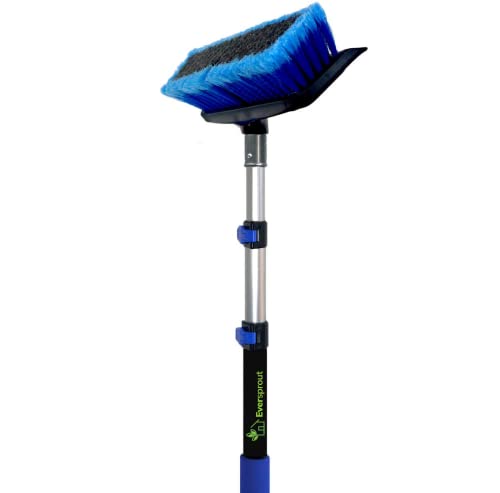
- Non-scratch scrub brush aluminum trailer
- Aluminum restoration polish kit


Before You Start
Prepare a shaded, well-ventilated workspace and protect nearby surfaces that could be affected by cleaners. Rinse the trailer to remove loose sand and road grit. Wear eye protection and gloves, especially when handling polishes and solvents. Plan a workflow that starts from the top and moves downward to prevent re-soiling freshly cleaned areas. Estimated time varies by trailer size and condition, typically 2–4 hours for a thorough job.
Critical cautions: avoid aggressive scrubbing that could scratch softer aluminum areas; test cleaners on a small inconspicuous patch first; never mix cleaners with incompatible products; follow manufacturer guidelines for each product to prevent damage.
Step-By-Step: How To Clean Aluminum Trailer
- Rinse the entire trailer with water to remove loose dirt and prevent scratching during cleaning.
- Apply a aluminum trailer cleaner kit per label instructions, focusing on oxidized areas and stubborn spots.
- Gently scrub with a non-scratch scrub brush aluminum trailer to lift embedded grime without scratching the surface.
- Rinse again to wash away cleaner residue and loosened particles.
- Apply a aluminum restoration polish kit to restore luster on dull or stained panels, working in small sections.
- For deeper oxidation, use a aluminum trailer polish compound with a dual action polisher for aluminum trailer on a low setting, moving in overlapping passes.
- Wipe clean with a microfiber cloth, checking for streaks or missed spots. Revisit stubborn areas as needed.
- Finish with a light, even pass of polish to seal the surface and enhance gloss.
- Inspect wheel wells, hitch areas, and trim for buildup; repeat cleaning steps as necessary in those zones.
- Optional: apply a protective wax or sealant designed for aluminum to extend the shine and ease future cleaning.
- Allow the surface to dry completely before attaching accessories or towing to ensure sealants form a proper bond.
- Document the process and schedule routine maintenance to prevent heavy oxidation build-up over time.
Troubleshooting
| Symptom | Likely Cause | Fix | Prevention |
|---|---|---|---|
| Dull, chalky finish | Oxidation buildup | Use aluminum restoration polish kit and a dual action polisher on low speed | Clean regularly; reapply sealant |
| Streaks after polishing | Residue left from cleaner or polish | Wipe with a clean microfiber and rinse thoroughly | Work in shade; use lint-free cloths |
| Scratches visible after cleaning | Brushing with abrasive tools | Switch to a non-scratch scrub brush and gentle cleaners | Test spot first; use soft pads |
| Sticky feel on surface | Heavy wax or sealant residue | Remove residue with a dedicated cleaner and rinse well | Follow product directions precisely |
| Poor adhesion of polish | Contaminated surface | Thoroughly degrease and re-clean before reapplying | Prep properly; remove oils |
Common Mistakes
- Using household detergents not designed for aluminum can dull the finish.
- Scrubbing with harsh brushes that scratch or bend thin aluminum panels.
- Skipping a pre-rinse, which can spread dirt and create scratches during cleaning.
- Applying sealants on a dirty or oily surface, reducing durability.
- Over-polishing fussy areas, leading to uneven sheen.
Tips For Best Results
- Work in small, manageable sections to ensure consistent results.
- Keep cleaning products away from rubber seals and plastic trims to avoid damage.
- Rinse between product layers to prevent residue buildup.
- Use a dual action polisher on a low setting to minimize heat and heat-related damage.
- After polishing, apply a UV-resistant sealant to protect against sun and road spray.
Call A Professional
Consider professional help if the trailer has extensive corrosion, deep pitting, or large oxidation areas that resist standard polishing. Stop-and-go signs include a rough, uneven finish after multiple attempts, panels with flaking paint (if present on minor areas), or a compromised structural seal. A pro can assess underlying metal integrity and provide safety-focused maintenance options.
FAQ
Can I use household cleaners on aluminum trailer surfaces?
Avoid household cleaners not designed for aluminum; they can damage the finish or strip protective coatings.
Is polishing necessary if the trailer looks clean?
Polishing helps restore luster and provides a protective layer that slows oxidation and makes future cleaning easier.
How often should I clean and polish an aluminum trailer?
Light maintenance every 1–2 months; a deeper polish every 6–12 months depending on exposure and use.
Do I need to remove all wax before applying a new layer?
Yes, remove old wax residue to ensure good adhesion and an even finish.
What safety gear is recommended?
Eye protection, gloves, and ventilation when using chemical cleaners and polishes.
Can you polish aluminum trailer wheels the same way?
Wheels require automotive-grade products and care; follow wheel-specific product instructions and avoid abrasive pads.
Buying Guide
When choosing products for cleaning and restoring an aluminum trailer, consider several key factors to ensure effective results and long-term durability.
- Size and scope: Larger trailers may benefit from a portable dual action polisher and a larger polishing pad set to cover panels efficiently.
- Noise level: Some buffers and polishers operate quietly; if you work in a shared or residential area, look for low-noise models.
- Energy efficiency: Choose energy-efficient tools that deliver consistent performance without excessive amperage draw.
- Controls: Variable speed controls and comfortable ergonomic handles help manage finishes without gouging the surface.
- Placement: Plan storage and workspace layout to minimize dirt transfer back onto cleaned areas; keep supplies organized for repeat sessions.
For best results, compare kits that include a cleaner, polish, and a restoration option. The right combination depends on the trailer’s level of oxidation and the desired gloss. If in doubt, test products on a small area first and follow all manufacturer instructions. A systematic approach reduces the risk of damage and enhances the trailer’s curb appeal.