Black acrylic sinks offer a sleek, modern look, but their matte surfaces can show soap scum, mineral deposits, and scratches more readily than lighter colors. This guide provides practical steps to clean and maintain a black acrylic sink without dulling or damaging the surface. Using gentle, acrylic-safe tools and products is essential for long-lasting shine and stain resistance.
Follow these proven methods to restore the luster of a black acrylic sink while preserving its finish and color. The focus is on safe cleaning practices, routine maintenance, and simple fixes for common issues that arise in busy kitchens or bathrooms.
Quick Answer
Best quick result: Use a pH-neutral acrylic-safe cleaner spray with a soft microfiber cloth, then wipe with a non-abrasive acrylic sink cleaner sponge. Finish with a soft polishing microfiber cloth for a streak-free shine. For stubborn residue, pair a nylon scrub brush with gentle pressure and rinse thoroughly.
What You’ll Need
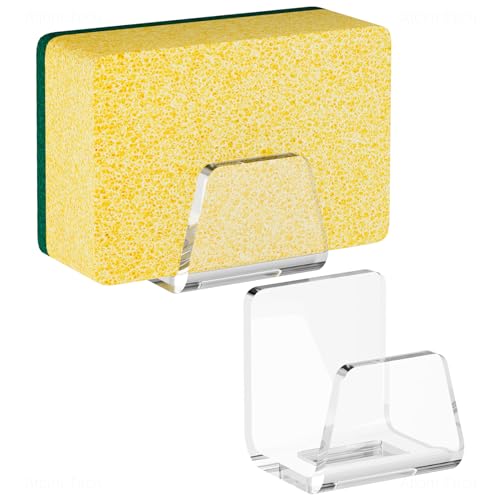
- Non-abrasive acrylic sink cleaner sponge
- Microfiber cleaning cloth for acrylic sinks
- Nylon scrub brush soft bristle bathroom sink
- PH neutral acrylic-safe cleaner spray for sinks
- Soft polishing microfiber cloth for acrylic surfaces


Before You Start
Before cleaning, rinse the sink to remove loose debris and standing water. Place a towel or mat at the base to catch drips and protect surrounding surfaces. Always test a small inconspicuous area first with any cleaner to ensure it does not change color or texture of the black acrylic. Allow any cleaner to sit only as directed to avoid dulling or etching.
Time estimate: 10–20 minutes for routine cleaning; 20–30 minutes for detailed polish or heavy staining. If you have multiple sinks or complex fixtures, allocate extra time. Safety note: avoid using abrasive pads or store-bought cleaners with ammonia or bleach on acrylic surfaces.
Step-By-Step: How To Clean A Black Acrylic Sink
- Rinse the sink with warm water to loosen debris and soap film.
- Spray a pH neutral acrylic-safe cleaner onto the surface, focusing on any stained or cloudy areas.
- Let the cleaner sit for 1–2 minutes to emulsify buildup, then use a non-abrasive acrylic sink cleaner sponge to gently wipe in circular motions.
- For stubborn deposits, apply light pressure with a nylon scrub brush soft bristle bathroom sink, avoiding aggressive scrubbing that can scratch the finish.
- Rinse thoroughly with warm water, ensuring all cleaner residue is removed to prevent streaks.
- Dry the surface with a soft polishing microfiber cloth for acrylic surfaces to minimize water spots and enhance shine.
- For a final polish, buff with a clean microfiber cloth until the surface looks evenly dark and smooth.
- If mineral deposits persist, repeat steps with additional cleaner and a gentle approach, avoiding harsh chemicals.
- Spot-clean around fixtures and drains with the same technique to prevent buildup from forming again.
- Establish a routine cleaning cadence, such as weekly quick wipes and monthly deeper clean, to maintain a pristine black acrylic sink.
- Optional: apply a light acrylic-safe protectant if recommended by the cleaner’s instructions, then wipe off per product guidance.
Troubleshooting
| Symptom | Likely Cause | Fix | Prevention |
|---|---|---|---|
| Streaks after drying | Water minerals or cleaner residue | Wipe with microfiber cloth after rinse; ensure thorough drying | Use distilled water for final rinse; avoid over-application of cleaner |
| Scratching or dull spots | Abrasive tools or harsh cleaners | Switch to non-abrasive sponge; discontinue abrasive pads | Use only pH-neutral acrylic-safe products |
| Persistent soap scum | Hard water minerals | Apply cleaner, let sit, then scrub with soft bristle brush | Wipe down after use to prevent buildup |
| Discoloration | Exposure to incompatible cleaners | Test a small area; switch to acrylic-safe cleaners | Follow manufacturer guidelines for cleaners |
Common Mistakes
- Using abrasive pads or brushes on a black acrylic surface
- Applying cleaners with ammonia, bleach, or solvents
- Rubbing aggressively, which can dull or scratch the finish
- Skipping thorough rinsing, leaving cleaner residues behind
Avoid these missteps to maintain the sink’s color and gloss. Regular, gentle cleaning yields the best long-term results.
Tips For Best Results
- Keep a routine: quick wipe after use and a deeper clean weekly.
- Always test new cleaners on a small area first.
- Use microfiber cleaning cloths to prevent lint and streaks.
- Store cleaning tools in a dedicated caddy to prevent cross-contamination with other bathroom products.
Call A Professional
Consider professional help if the sink shows deep scratches, yellowing, or persistent cloudiness after multiple cleanings. Stop using the sink if you notice cracking or warping, or if cleaners cause unusual smells or surface damage. A licensed plumber or countertop specialist can assess structural concerns or advise on surface refinishing or replacement options.
FAQ
Can I use vinegar on a black acrylic sink?
Vinegar is acidic and may be safe in small amounts, but it’s better to rely on a pH neutral acrylic-safe cleaner to avoid potential surface damage over time.
What helps remove hard water deposits from acrylic sinks?
Apply a mild, acrylic-safe cleaner and use a soft bristle brush, then rinse thoroughly and dry with microfiber cloth.
Is it necessary to dry the sink after cleaning?
Yes. Drying prevents water spots and mineral buildup, keeping the surface glossy.
How often should I deep-clean my black acrylic sink?
Plan a thorough clean every 2–4 weeks, with lighter wipe-downs in between as needed.
Buying Guide
Choosing the right supplies for a black acrylic sink depends on several factors to balance cleaning effectiveness with surface safety.
Size and fit: Consider cleaner spray bottles and sponge sizes that comfortably reach corners and the drain area. For larger sinks, a hand-held brush may speed up cleaning without excessive scrubbing.
Noise level: Cleaning can involve brushes or rags; select soft brushes and quiet cloths to minimize noise in quiet bathrooms or early morning routines.
Energy efficiency: Not directly applicable to cleaning products, but choose concentrated products to reduce waste and packaging.
Controls: Opt for spray cleaners with clear instructions and simple dispensing controls to avoid overuse. Look for pH-neutral formulas labeled acrylic-safe.
Placement and storage: Keep cleaners in a cool, dry cabinet away from sunlight. Organize tools so the microfiber cloths and sponges stay clean and accessible.
Comparative perspectives: A microfiber cloth alone can reduce streaks, but pairing it with a dedicated acrylic-safe cleaner provides better stain removal without surface damage. A soft nylon scrub brush helps with stubborn buildup but should be used sparingly on matte black finishes.
With these factors in mind, you can assemble a compact, effective kit tailored to a black acrylic sink’s needs. A thoughtful combination of a non-abrasive sponge, a microfiber cloth, and a pH-neutral acrylic-safe cleaner generally delivers the best results for routine maintenance and occasional heavy cleaning. Do you prefer a minimal, quick-clean routine or a deeper monthly refresh? Either approach works when the right tools are in place.