Disney pins are beloved collectibles that can accumulate dirt, oils, and tarnish over time. Proper cleaning helps preserve the enamel detail, metal finish, and color integrity without damaging the pins. This guide provides a practical, step-by-step approach using commonly available tools and safe methods suitable for most enamel and metal Disney pins.
Quick Answer
Gently remove surface dust with a soft brush, then clean in warm, soapy water. Use a soft cloth or microfiber for drying, and avoid harsh chemicals. For deeply embedded grime or vintage pins, rely on a small ultrasonic cleaner or a dedicated pin cleaning kit, following manufacturer instructions.
What You’ll Need
Before you start, gather these tools. They are chosen to work well with enamel pins and metal finishes while minimizing risk to the pin’s design.
- Enamel pin cleaning brush
- Jewelry cleaning kit soft bristle brush
- Microfiber cloth for jewelry cleaning pins
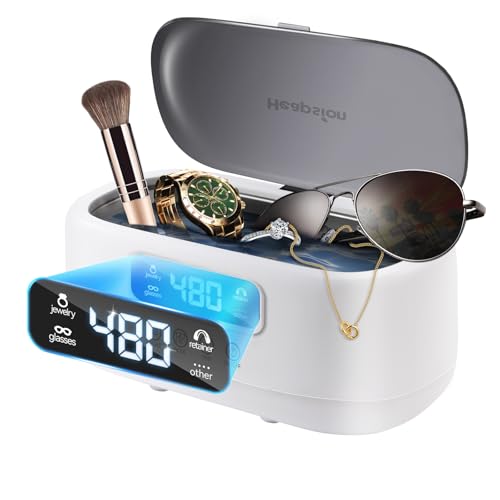
- Ultrasonic jewelry cleaner small desktop
- Pin cleaning kit brush and cleaning solution set


Before You Start
Assess the pin’s condition: surface dirt, light tarnish, or sticky residues may respond differently. Always test a small, inconspicuous area first. Protect the pin back and any attachments to prevent loosening or bending. Time estimate: 10–30 minutes, depending on the number of pins and the level of grime. Do not soak pins with glued or loose enamel parts as water exposure can loosen components or blur colors.
Step-By-Step: How To Clean Disney Pins
- Prepare a cleaning station with a bowl of warm water and a few drops of mild dish soap.
- Gently dip a soft brush in the soapy water and brush the front and back surfaces in light, circular motions.
- Rinse the pin carefully under lukewarm running water to remove soap residue.
- For stubborn grime, use a enamel pin cleaning brush or a soft bristle brush from a jewelry cleaning kit to target corners and the enamel edges.
- Pat dry with a microfiber cloth for jewelry cleaning pins, then air dry on a clean surface to ensure all moisture evaporates.
- If the grime persists, consider an ultrasonic jewelry cleaner on a gentle setting for a short cycle, avoiding long exposure on delicate pins.
- Inspect the pin for remaining residues. Repeat steps as needed, taking care not to scrub too aggressively.
- Store clean pins in a dry, padded container to prevent scratches and color wear.
- For lot cleaning, separate pins by finish (gold-tone, silver-tone, painted enamel) to minimize color transfer or abrasions.
- Document any restoration effort on the pin’s care notes to track changes and plan future maintenance.
- If a pin has loose posts or backing, do not force tightening; address with proper backing replacement instead.
- After cleaning, wipe down the back of each pin and ensure the backings sit snugly before placing them back in storage.
Troubleshooting
| Symptom | Likely Cause | Fix | Prevention |
|---|---|---|---|
| Water spots or dull finish | Soap residue or mineral deposits | Re-rinse with clean water and dry with microfiber | Rinse thoroughly; dry immediately |
| Enamel scratches after cleaning | Abrasive brushing | Switch to ultra-soft brush; avoid hard scrubbing | Use proper brush type; gentle pressure |
| Backing loose or posts bent | Over-cleaning or pressure | Replace backing; straighten or replace post if needed | Handle with care; avoid twisting |
| Color fading on painted enamel | Harsh chemicals or heat exposure | Stop using harsh cleaners; store away from heat | Use mild cleaners; keep out of direct sunlight |
Common Mistakes
- Using harsh detergents or bleach on enamel pins
- Soaking pins with fragile backs or glued components
- Applying excessive force with brushes or lint-free cloths
- Relying on heat or hot water, which can warp metal parts
Tips For Best Results
- Clean pins in small batches to maintain control and consistency.
- Always pat dry first, then air dry to prevent water spots and streaks.
- Use a dedicated microfiber cloth for dust and light cleaning between more thorough cleanings.
- Keep a care log noting any repairs or protective storage steps for future reference.
Call A Professional
Seek professional help if any pin is valuable, vintage, or has structural damage such as bent posts, cracked enamel, or missing stones. Stop cleaning if you notice worsening cracks, color bleeding, or backing failure. A jewelry maker or pin specialist can offer restoration options and professional backing replacements.
FAQ
Can I clean Disney pins with plain water?
Plain water can help remove surface dust, but soap is recommended to dissolve oils and residues.
Is an ultrasonic cleaner safe for all pins?
Ultrasonic cleaners can be effective but may loosen glued parts or damage delicate enamel if used improperly. Follow device instructions and use gentle settings.
What should I do if color fades after cleaning?
Stop aggressive cleaning and store the pin away from sunlight; consult a professional for color restoration options.
How often should I clean my Disney pins?
Light cleaning every few weeks is helpful; perform a deeper clean every few months or as needed based on use and storage conditions.
Buying Guide
When choosing cleaning tools for Disney pins, consider size, material compatibility, and storage hygiene. Look for a compact ultrasonic cleaner with adjustable cycles for small items, a soft-bristle brush set designed for enamel, and a microfiber cloth that leaves no fibers behind. For larger pin collections, a dedicated jewelry cleaning kit soft bristle brush and a microfiber cloth for jewelry cleaning pins combination offers flexibility. Always start with mild cleaning solutions and avoid harsh chemicals. If you have sensitive or rare pins, you might prefer a pin cleaning kit brush and cleaning solution set that includes gentle formulas specifically formulated for enamel and metal finishes. Consider how you store pins after cleaning—a padded, segmented box protects finishes and reduces friction during daily handling.