Hard water deposits can leave windows looking dull with chalky white streaks. This guide provides practical steps using common cleaning tools and purpose-built products to remove mineral buildup without damaging glazing or seals. The methods work on residential windows, storefronts, and car dealership displays alike, and emphasize safe handling and effective soil removal.
Quick Answer
Quick method: Wipe with a glass cleaner descaler spray, scrub gently with a microfiber cloth, then rinse and dry with a 12 inch window squeegee blade to streak-free results. For stubborn deposits, repeat with lime scale remover gel and extendable kit for hard-to-reach panes.
What You’ll Need
- Window squeegee with 12 inch rubber blade for hard water stains
- Glass cleaner descaler spray for hard water deposits on windows
- Microfiber window cleaning cloth 16×16 for hard water spots
- Extendable window cleaning kit with scraper and microfiber pads
- Lime scale remover gel for windows hard water deposits
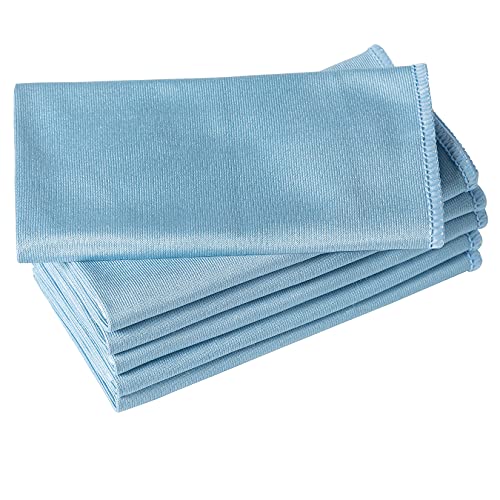

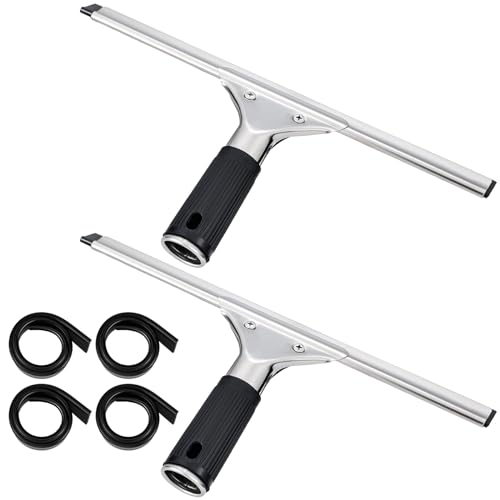
Before You Start
Before treating mineral buildup, inspect seals and frames for wear or damage. Protect surrounding surfaces with a drop cloth or old towels. For exterior windows, choose a cool, overcast day to prevent rapid evaporation that can cause streaking. Time estimates: 20–60 minutes for a standard home set of windows. Caution: Do not mix cleaning chemicals, and avoid using metal brushes that could scratch glass. Always wear gloves if you have sensitive skin and keep cleaners out of reach of children.
Step-By-Step: How To Clean Hard Water Off Windows
- Remove loose dust with a dry microfiber cloth to reduce grinding mineral particles during cleaning.
- Apply the glass cleaner descaler spray to a small section, focusing on thin lines where mineral deposits are most visible.
- Let the cleaner sit for 30–60 seconds to break down the calcium and magnesium minerals, then wipe with a microfiber cloth in a circular motion.
- Rinse the area with clear water or a damp cloth to remove the loosened deposits, then dry with the 12 inch squeegee blade, starting at the top and moving downward.
- For persistent spots, apply lime scale remover gel directly to the stain, wait the recommended time, and gently agitate with the soft scraper in the extendable kit.
- Wipe again with a microfiber cloth, re-wet if necessary, and perform final passes with the squeegee to remove all moisture.
- Inspect for remaining haze or leftovers and repeat the process on those areas if needed.
- Finish by buffing with a dry microfiber cloth to restore shine and prevent new water staining from forming quickly.
- Clean the squeegee blade edge after use to keep it free of mineral buildup for future cleanings.
- For tall or hard-to-reach windows, extend the kit and use microfiber pads to loosen deposits before re-squeegeeing the pane.
- Store all products away from direct sunlight and heat, following label directions for any repeats or maintenance steps.
Troubleshooting
| Symptom | Likely Cause | Fix | Prevention |
|---|---|---|---|
| Streaks after cleaning | Residual cleaner or mineral residues | Rewipe with damp microfiber, then dry with squeegee | Use a final wipe with a dry cloth |
| Cloudy or etched look on glass | Overexposure to strong lime scale gel | Rinse thoroughly and avoid prolonged contact; re-clean with milder solution | Test on a small area first |
| Deposition returns quickly | Hard water reappears from source fixture | Seal or treat the water source or install water softening if feasible | Regular maintenance cleanings |
| Blade leaves scratches | Razor-tip or dirty blade | Use a fresh blade or replace the squeegee; avoid scraping hard deposits | Keep blade clean and stored safely |
Common Mistakes
- Using extremely hot water that causes rapid evaporation and streaks
- Applying cleaners on dry glass without pre-wetting first
- Using abrasive tools on delicate glass surfaces
- Neglecting to rinse lime scale remover completely
Tips For Best Results
- Work in sections: small panels reduce the chance of streaks forming while the cleaner dries
- Choose the right time of day: overcast light helps you see spots you might otherwise miss
- Use a dedicated microfiber cloth for hard water deposits to avoid cross-contamination with other surfaces
- Warm but not hot days are ideal for exterior windows; early morning or late afternoon can prevent rapid drying
- Keep a spare squeegee blade and microfiber cloth on hand to handle tough builds quickly
Call A Professional
Consider contacting a pro if windows are severely etched, if deposits are stubborn beyond home methods, or if windows are part of a critical storefront display. Stop signs include persistent hazing after multiple cleanings, damaged glazing or seals, or if cleaning requires climbing to high elevations without proper equipment.
FAQ
Can I use vinegar to remove hard water deposits on windows?
Vinegar solutions can help with mineral buildup, but test on a small area first and avoid long exposure on sensitive coatings.
Is it safe to use a squeegee on tinted windows?
Yes, but select a soft blade and test a small area to ensure no texture or film is left behind.
How often should I clean windows with hard water deposits?
Frequency depends on water hardness and climate; exterior windows may require monthly or bi-monthly cleanings in hard-water regions.
Do I need to polish windows after cleaning?
A light wipe with a dry microfiber cloth often suffices to prevent streaks and restore shine.
Can the extendable kit damage high windows?
Use the kit with caution, keep feet planted, and avoid rigid force. Consider a professional lift for very high panes.
What should I do if water spots come back quickly?
Inspect the source of water and consider a rotating cleaning schedule, combined with a preventative wiping after rains or irrigation.
Buying Guide
When choosing tools and products for cleaning hard water from windows, consider size, noise level, energy efficiency, controls, and placement. For most US homes, a 12-inch squeegee blade balances speed and reach without feeling bulky. Look for quiet, hand-friendly cleaners and sprays that cling to vertical surfaces without dripping excessively. A microfiber cloth with high absorbency reduces streaks and minimizes chemical use. An extendable cleaning kit helps reach second-story panes or storefront windows without ladders, improving safety and efficiency.
Key buying factors include:
- Size and reach: 12-inch squeegees cover wide panels; extendable handles reach higher or wider panes.
- Cleaning power: Descaler sprays and lime scale gels should be compatible with your glass type and coating; avoid harsh chemicals on specialty windows.
- Material quality: Microfiber pads with dense fibers resist mineral buildup and last longer between replacements.
- Ease of use: Simple controls and quick-dry action improve efficiency on busy days.
- Placement: Exterior windows may need weather-resistant options; interior panes benefit from quick-drying formulas to prevent streaking.
Ask questions like: Do you prefer a multi-tool kit with a scraper and microfiber pads, or a focused spray-and-wipe setup? How often do you clean exterior windows, and what is the typical water hardness in your area? By matching product features to your cleaning needs, you can choose a setup that delivers clear, streak-free glass with minimal effort.