Keeping a vehicle’s headliner clean preserves the interior’s look and resale value. A properly cleaned headliner removes dirt, oils, and stains without damaging delicate fabric or foam. The following guide explains a practical, step-by-step method using common car care tools and safe cleaning products.
This article outlines a practical approach for American drivers, balancing effectiveness with caution to protect the headliner. It covers equipment, preparation, execution, and troubleshooting to help achieve a fresh, uniform result.
Quick Answer
Gently vacuum the headliner, spot-treat stains with an auto upholstery stain remover spray for headliner, then lightly mist and blot with a microfiber brush and microfiber detailing cloths for car headliner. Use a steam cleaner attachment for stubborn spots if the fabric allows, and finish with a thorough air-dry before use.
What You’ll Need
- Car headliner cleaning kit microfiber brush
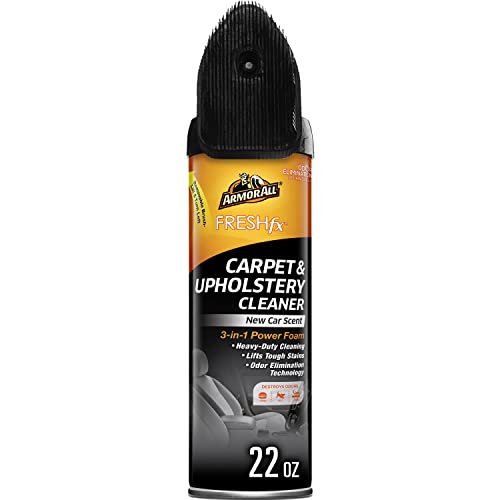
- Auto upholstery stain remover spray for headliner
- Portable car vacuum with upholstery nozzle
- Steam cleaner attachment for car interior
- Microfiber detailing cloths for car headliner


Before You Start
Prepare a clean, well‑lit workspace inside the car. Protect nearby surfaces with towels to catch drips. Work in a shaded area to prevent cleaning solutions from drying too quickly. Time: plan 45–90 minutes depending on stain severity. Important cautions: avoid oversaturation, test cleaners on an inconspicuous area first, and never scrub aggressively; this can loosen the fabric or foam backing.
Step-By-Step: How To Clean A Car Headliner
- Remove loose debris with a light vacuum using the upholstery nozzle to prevent Embedment into the fabric.
- Assess stains and grime to determine if spot treatment is enough or if full cleaning is required.
- Lightly mist the stained area with a mixed cleaner solution or a dedicated auto upholstery stain remover spray for headliner, avoiding soaking the fabric.
- Gently dab the stain with a microfiber detailing cloth, working from outside the stain toward the center to prevent spreading.
- For stubborn spots, use a steam cleaner attachment for car interior at a low, steady setting, keeping the nozzle at a safe distance to minimize moisture.
- Refresh the area with a clean microfiber brush to lift fibers and restore texture, then blot with a dry cloth to remove moisture.
- Repeat as needed in small sections, ensuring you do not saturate the foam backing.
- Allow the headliner to air-dry completely with windows open and the car parked in a shaded area.
- Once dry, perform a final light vacuum to lift fibers and remove any remaining dust.
- Inspect for any remaining stains; repeat spot treatment only if necessary to avoid over-wetting.
- Store tools properly to prevent spillages and ensure readiness for future maintenance.
- Schedule periodic cleanings to maintain fabric integrity and prevent buildup.
Troubleshooting
| Symptom | Likely Cause | Fix | Prevention |
|---|---|---|---|
| Stains reappearing after cleaning | Residual oils or improper drying | Reapply stain remover to the spot and blot with a dry microfiber cloth; ensure complete drying | Use minimal moisture and improve drying conditions |
| Fabric fraying or stiffness | Over-wetting or harsh scrubbing | Stop scrubbing; allow longer drying; consider professional cleaning if fabric damage is suspected | Avoid aggressive brushing |
| Headliner texture looks matted | Moisture exposure or heavy brush | Lightly mist with cleaner, brush gently, and let fibers recover while drying | Use gentler methods and monitor moisture |
| Odor persists | Embedded moisture or mold risk | Increase drying time and ventilate the cabin; consider a deodorizing fabric spray after dryness | Ensure thorough drying after cleaning |
Common Mistakes
- Over-wetting the headliner, which can loosen fibers or cause sagging
- Choosing harsh chemical cleaners that bleed or discolor fabric
- Scrubbing too hard, leading to fabric wear or foam exposure
- Not testing cleaners on a hidden area first
- Neglecting complete drying, which invites mildew or odors
Tips For Best Results
- Test any cleaner on an inconspicuous corner before full application
- Work in small sections to prevent over-wetting
- Use a dual‑tone microfiber approach: one for staining, one for drying
- Keep windows slightly open to facilitate airflow and faster drying
- Store a dedicated car headliner brush kit for quick touch-ups
Call A Professional
Consider a pro if the headliner is heavily stained, sagging, or moisture has penetrated the foam backing. Stop signs include persistent odor, visible mold, or fabric detachment. A professional detailer can assess fabric integrity and use industry-grade products with controlled moisture to preserve the headliner.
FAQ
Can I use household cleaners on a car headliner?
It’s best to use products designed for auto upholstery and test any cleaner first to avoid damage.
Is steam cleaning safe for all headliners?
Steam can be effective for some fabrics but may damage others; verify compatibility before use.
How long does it take for a headliner to dry?
Drying times vary; plan for several hours with proper ventilation and shade.
What if my headliner squeaks after cleaning?
Lightly brush and allow to dry completely; avoid applying moisture to the foam backing.
Buying Guide
When choosing tools for cleaning a car headliner, consider size, performance, and compatibility with your vehicle’s interior. Look for compact, battery-powered options for portability, and ensure cleaning solutions are labeled safe for automotive fabric. Key buying factors include:
- Size and portability: A compact steam cleaner attachment and handheld vacuum work well in tight spaces.
- Noise level: Quieter models reduce cabin disturbance during cleaning.
- Energy efficiency: Battery-powered tools offer flexibility but check run-time.
- Controls: Simple spray and suction controls help manage moisture.
- Placement: Lightweight tools minimize the risk of pulling or sagging the headliner during cleaning.
For a balanced setup, consider a dedicated car headliner cleaning kit microfiber brush and microfiber detailing cloths for car headliner, complemented by an auto upholstery stain remover spray for headliner and a portable car vacuum with upholstery nozzle. If stubborn stains persist, a steam cleaner attachment for car interior can help, but always follow fabric guidelines. Do you prefer a compact, all-in-one kit or separate specialty tools? The right combination makes routine headliner care faster and safer.