Leather car seats add a premium look and feel, but they require careful cleaning to maintain softness and prevent damage. This guide outlines practical steps, the best products, and safe practices for American vehicles.
Readers will learn a clear, hands-on method to remove dirt, refresh the surface, and protect leather seats from wear and UV exposure.
Quick Answer
Use a pH-balanced leather cleaner spray for routine cleaning, follow with a dedicated leather conditioner, and finish with a microfiber cloth to wipe away residue. For tough spots, apply a gel stain remover, then re-condition the area for even coloration.
What You’ll Need
- Leather car seat cleaner kit with brush and microfiber cloth
- Pu200bH balanced leather car seat cleaner spray
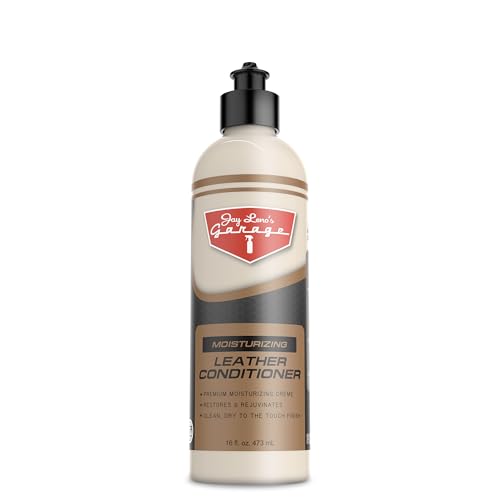
- Leather conditioner for car seats cream
- Microfiber cloths for leather car seat cleaning
- Stain remover for leather car seats gel


Before You Start
Test any product on an inconspicuous area of the seat before full use. Work in a well-lit, shaded area of the vehicle to avoid rapid drying or staining from sun exposure. Avoid harsh solvents and abrasive brushes, which can strip color or dry out leather. Plan for about 30–60 minutes for a thorough cleaning, depending on seat condition.
Step-By-Step: How To Clean Leather Car Seats
- Remove surface dust with a dry microfiber cloth to prevent rubbing dirt into the leather.
- Apply a light mist of pH balanced leather car seat cleaner spray to a clean microfiber cloth or brush, according to product instructions.
- Gently agitate a small, inconspicuous area with the brush to lift dirt without scrubbing the surface.
- Wipe the area with a separate clean microfiber cloth to lift and remove loosened grime.
- For stains, apply a small amount of stain remover for leather car seats gel, following the product directions, and blot rather than scrub.
- Repeat the cleaning motions across the seat, taking care around seams and stitching to avoid moisture pooling.
- Apply a thin layer of leather conditioner for car seats cream after cleaning to moisturize and protect the surface.
- Buff the seat with a dry microfiber cloth to remove any remaining moisture and to restore the leather’s natural sheen.
- Inspect the entire seat for missed spots; repeat targeted cleaning as needed, then reapply conditioner to any dry patches.
- Let the conditioner cure as directed, usually a few hours or overnight, before heavy use or sitting on freshly treated seats.
- Maintain routine cleaning every 1–3 months, or more often in high-traffic or sunny conditions.
- Store cleaning tools in a clean, dry place and use dedicated cloths only for leather to prevent cross-contamination.
Troubleshooting
| Symptom | Likely Cause | Fix | Prevention |
|---|---|---|---|
| Sticky residue after cleaning | Overuse of cleaner or from not wiping residue | Wipe with a clean damp cloth, then dry with microfiber | Use light applications; follow directions |
| Faded color or uneven tone | Strong cleaners or sun exposure | Apply conditioner evenly; consider professional color correction if needed | Shield seats from direct sunlight |
| Dry, cracked feeling after cleaning | Overly harsh cleaner or long intervals between conditioning | Recondition and moisturize; avoid over-cleaning | Maintain regular conditioning schedule |
| Stain reappears after drying | Residual stain product or incomplete cleaning | Re-treat with stain remover gel and re-clean | Pre-treat new spills promptly |
Common Mistakes
- Over-wetting leather seats, which can lead to water damage or mold in seams.
- Using household cleaners (like dish soap) that disrupt leather oils.
- Skipping patch tests, risking color changes or finishes.
- Neglecting to condition after cleaning, causing dryness and cracking.
- Using abrasive brushes that scratch the leather surface.
Tips For Best Results
- Work in small sections to ensure even cleaning and drying.
- Always follow the product’s directions for dwell time and recommended cloth type.
- Keep tools clean; rinse brushes and cloths frequently during the job.
- Use a dedicated, snug-fitting microfiber cloth for best dust pickup and finish.
- Condition every 2–3 cleanings or as the leather shows signs of dryness.
Call A Professional
Consider professional help if the seats show deep staining, extensive cracking, or color loss that affects the interior aesthetics or resale value. Signs to seek expert help include persistent odors, dye transfer that won’t lift, or leather that feels unusually stiff after conditioning.
FAQ
Can I use water to clean leather car seats?
Water can be used sparingly with a pH-balanced cleaner, but avoid saturating the leather to protect the underlayers.
How often should I condition leather car seats?
Condition every 2–3 cleanings or when the leather starts to feel dry or matte.
Is conditioner necessary after every cleaning?
Yes, to maintain moisture and flexibility and to protect the surface.
Will cleaning your leather seats affect color?
Proper products and patch testing minimize color changes, but some natural variation can occur over time.
Buying Guide
When selecting products for cleaning leather car seats, consider factors such as the seat’s finish, leather type, and climate. Important buying factors include size and compatibility with automotive leather, noise level of any spray application processes, and energy efficiency of household tools used during cleaning.
Key considerations:
- Size and coverage: Choose sized kits that fit your vehicle and seat area.
- Cleaning formula: Opt for pH-balanced, leather-specific sprays to preserve finish.
- Conditioner type: Cream formulas offer deep hydration; some prefer lotions for lighter absorption.
- Tools included: Brushes and microfiber cloths improve cleaning effectiveness without abrasion.
- Stain removal options: Gel stains are typically gentler on finishes than harsher solvents.
- Safety and compatibility: Verify product compatibility with your seat’s dye and finish, and perform patch tests.
- Storage and ease of use: Look for compact, easy-to-store kits with clear instructions.