Makeup brushes collect oil, product residue, and bacteria with every use. Using a gentle dish soap like Dawn can break down oils while remaining safe for brushes. This guide walks through a practical, bathroom-friendly method to refresh brushes while preserving their bristles and shape.
Readers will find a streamlined approach, plus gear that can simplify the cleaning process and help brushes dry quickly and evenly.
Quick Answer
Best quick method: Rinse brushes under lukewarm water, apply a small drop of Dawn with a cleaning tool or your fingers, lather gently, rinse until clear, gently squeeze out excess water, reshape bristles, and air-dry completely.
Estimated time: 10–20 minutes for a full brush set, plus 6–12 hours to dry fully depending on brush density.
What You’ll Need
- Silicone makeup brush cleaning mat or silicone glove for gentle agitation and dirt removal
- Makeup brush cleaning glove silicone as a hands-free option
- Makeup brush cleaning bowl with ridges to create a swirling cleaning action
- Ultrasonic makeup brush cleaner for deep, thorough cleaning
- Makeup brush drying rack to hold brushes upright as they dry
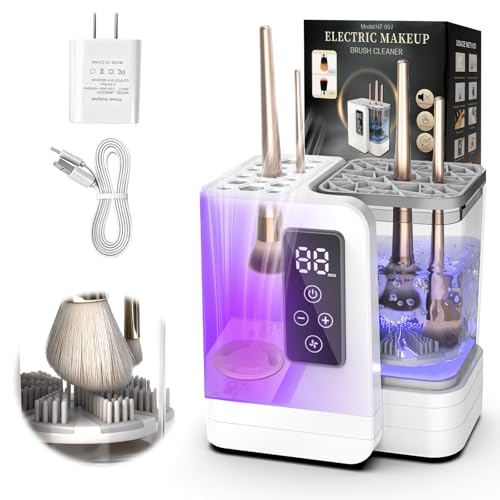


Before You Start
Choose a workstation with easy access to water. Use lukewarm water—not hot—to prevent bristle damage. Protect surfaces with a towel to catch splashes. Never submerge brush ferrules in water for long periods, as it can loosen glue. Time estimate for this step is about 5 minutes for setup.
Inspect brushes for shedding or broken bristles. If a brush is severely damaged, consider replacing it. Keep liquid away from wooden handles when possible to extend life.
Step-By-Step: How To Clean Makeup Brushes With Dawn
- Prep brushes by rinsing them under lukewarm water to remove surface makeup, holding them with bristles pointing downward.
- Fill a cleaning bowl with warm water and a drop of Dawn dish soap to create a sudsy base.
- Dip the bristles into the soap, avoiding the ferrule, and work the soap into a gentle lather using circular motions.
- Use a silicone makeup brush cleaning mat or the silicone cleansing system to massage bristles and dislodge deep residue.
- Rinse brushes under lukewarm water until the water runs clear, again keeping the ferrule away from direct water exposure.
- Gently squeeze out excess water with a clean towel and reshape the bristles.
- Lay brushes across a makeup brush drying rack or hang them with bristles pointing down to air-dry completely.
- For stubborn grime on dense brushes, repeat steps 2–5 or consider an ultrasonic makeup brush cleaner for deeper cleaning, following manufacturer instructions.
- Fully dry before storing to prevent mold and preserve brush performance.
- Regular cleaning (weekly for daily-use brushes) helps keep bristles resilient and makeup application smooth.
- Store brushes upright in a clean container away from direct sunlight to avoid bristle deformation.
Troubleshooting
| Symptom | Likely Cause | Fix | Prevention |
|---|---|---|---|
| Brushshed more than usual after cleaning | Old, damaged bristles or high-residue brushes | Inspect and replace damaged brushes; clean more thoroughly | Clean brushes more frequently; avoid overloading with heavy products |
| Water gets into ferrule | Ferule exposed to water during washing | Keep ferrule dry; rinse bristles only | Face washing toward downward angle; use bowl or mat properly |
| Rinse water remains pigmented | Thick makeup residue lingering in bristles | Repeat cleaning steps or use ultrasonic cleaner for deep cleaning | Clean brushes after heavy product days |
| Brush bristles feel stiff after drying | Overexposure to heat or improper drying | Air-dry in shade; avoid heat sources | Use gentle rinse and avoid hot sunlight |
Common Mistakes
- Letting water sit in the ferrule for long periods
- Using hot water which can warp bristles
- Over-soaping dense brushes, causing residue buildup
- Pushing bristles back into a closed brush sleeve while wet
Keeping to gentle, consistent cleaning routines helps extend brush life and maintain precise makeup application.
Tips For Best Results
- Match cleaning frequency to usage: daily-use brushes may need weekly deep cleaning; others can be cleaned every 2–3 weeks.
- Rinse thoroughly to prevent soap residue that can irritate skin or affect color payoff.
- Always reshape bristles after washing to maintain original brush shape.
- Store brushes with bristles facing down or in a vertical rack to prevent moisture trapping.
- Consider rotating among several brushes to reduce repeated heavy use on a single brush between cleanings.
Call A Professional
If brushes develop persistent mold, unpleasant odor, or structural damage to bristles or handles, stop using them and consult a professional or replace them. Do not attempt complex repairs on compromised brushes.
FAQ
Can I use any dish soap to clean makeup brushes?
Yes, a gentle dish soap like Dawn works well to break down oils without harsh effects on most synthetic bristles.
Is Dawn safe for natural hair brushes?
In most cases, yes, but test on a small brush first and ensure thorough rinsing to protect bristle integrity.
How often should I deep-clean my brushes?
Deep-clean dense and professional brushes every 1–2 weeks with heavy makeup use; lighter use may be monthly.
What drying method is best?
Air-dry bristles down or flat, away from direct heat or sunlight for best results.
Buying Guide
When shopping for brush-cleaning tools, consider the following factors to build an efficient setup without overpaying.
Size and capacity: Choose a mat, glove, or bowl that fits your typical brush sizes and the amount of water you use. Larger kits support whole-face brush sets.
Noise level: Ultrasonic cleaners can be quiet, but some models produce more sound. If the bathroom is shared, look for low-noise options.
Energy efficiency: Electric cleaning devices use energy; compare averages and idle power consumption to minimize running costs.
Controls: Simple on/off models are user-friendly; advanced cleaners offer timers and temperature controls for precision cleaning.
Placement: Consider whether you want countertop mats, wall-mounted racks, or a drying station that fits your vanity. Ensure the setup dries brushes properly and keeps water away from the bristles.
For users seeking a balanced, practical kit, starting with a silicone brush cleaning mat or a cleaning bowl with ridges plus a drying rack often provides foundational benefits. If deeper cleaning is needed, an ultrasonic cleaner can be a worthwhile upgrade.