Mold in bathrooms, kitchens, and basements is a common headache. Vinegar offers a simple, effective way to tackle many mold spots without harsh chemicals. This guide provides step-by-step instructions, safety notes, and practical tips to get surfaces mold-free and safer to live with.
Quick Answer
For many mold spots, straight white vinegar applied with a spray bottle can kill up to 82% of mold species, followed by scrubbing with a stiff nylon brush or microfiber cloth. For stubborn grout lines, a dedicated grout brush can help. Always ventilate the area and dry surfaces after cleaning to prevent regrowth.
What You’ll Need
- 16 oz spray bottle for vinegar mold cleaning
- Stiff nylon scrub brush for mold removal bathroom
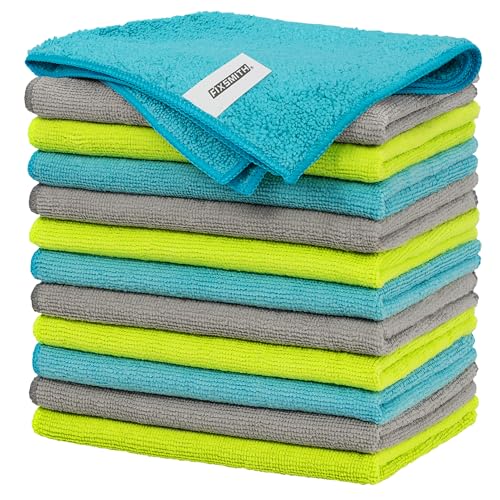
- Microfiber cleaning cloth 12×12 mold cleaning
- Grout brush stiff nylon for mold in shower
- Squeegee for mold stained windows bathroom tiles


Before You Start
Prepare the area by removing loose items and protecting nearby surfaces that vinegar could etch. Ensure good ventilation—open windows and run the exhaust fan. Wear protective gloves and, if sensitive, eye protection. Never mix vinegar with bleach or ammonia, as this can create toxic fumes. Estimate the cleaning time as 20–60 minutes depending on the size of the affected area and the level of buildup.
Step-By-Step: How To Remove Mold With Vinegar
- Fill the 16 oz spray bottle with plain distilled white vinegar. Do not dilute for best antimicrobial action.
- Spray vinegar liberally onto the moldy area, ensuring the surface is thoroughly coated.
- Let the vinegar sit for 15–30 minutes to penetrate the mold membranes.
- Use the stiff nylon scrub brush to agitate grout lines and textured surfaces, applying steady pressure.
- Wipe with a microfiber cloth to remove loosened mold and vinegar residue.
- For stubborn spots, reapply vinegar and scrub with the grout brush or nylon brush until clean.
- Rinse the area with water or wipe with a damp cloth, then dry with the microfiber cloth or a squeegee where applicable.
- Use the squeegee on windows, tiles, or glossy bathroom surfaces to remove excess moisture and prevent new mold growth.
- Repeat the process for heavily affected areas, and consider applying a light vinegar spray weekly as preventive maintenance.
- Check corners, seals, and grout lines regularly and address moisture sources to keep mold from returning.
- After cleaning, discard any used towels or cloths that are heavily contaminated to avoid cross-contamination.
- For persistent mold that reappears after repeated cleaning, consider professional assessment or alternative cleaning methods.
Troubleshooting
| Symptom | Likely Cause | Fix | Prevention |
|---|---|---|---|
| Faint odor or faint mold after cleaning | Residual spores in porous materials | Reapply vinegar, extend contact time, repeat cleaning | Increase ventilation, dry surfaces completely |
| Streaks or discoloration after wiping | Surface residue or mineral deposits | Wipe with a fresh microfiber cloth dampened with water | Rinse surfaces with clean water before drying |
| Visible mold returns within days | Moisture source not addressed | Fix leaks, improve ventilation, consider mold-resistant paint | Control humidity and moisture levels long-term |
| Color change on grout or tiles | Over-oxidation or porous material staining | Consider alternative cleaners for sensitive surfaces | Seal grout after cleaning to reduce absorption |
Common Mistakes
- Using vinegar on porous stone surfaces such as marble or concrete sealers that can be damaged by acidity
- Ignoring hidden mold behind wallpaper, under sinks, or inside wall cavities
- Rushing cleaning without allowing sufficient contact time for the vinegar to work
- Over-wetting materials in areas with poor airflow, which encourages regrowth
Tips For Best Results
- Use the microfiber cloth for quick wipe-downs after the vinegar treatment to remove moisture from surfaces.
- Keeping a dedicated squeegee handy makes bathroom tile and glass streak-free and reduces moisture retention.
- For high-traffic areas, schedule routine maintenance to catch mold before it spreads.
- Store vinegar spray in a cool, dark place to maintain efficacy over time.
Call A Professional
Consider calling a professional if mold covers a large area (for example, more than about 10 square feet), mold recurs despite cleaning, or there are signs of underlying water damage or hidden infestations. Seek urgent help if you notice health symptoms such as persistent coughing, wheezing, or nasal irritation when indoors, which may indicate deeper mold exposure.
FAQ
Can I use plain white vinegar to clean all mold?
White vinegar is effective for many common mold spots, especially mildew on non-porous surfaces, but some materials may require specialized cleaners or professional treatment.
Is vinegar safe for bathroom grout?
Yes, vinegar can help with mildew and minor mold on grout, but stubborn buildup may need a dedicated grout brush and repeated applications.
Should I rinse after using vinegar?
A light rinse with water followed by thorough drying helps remove residue and minimizes streaks.
What if vinegar doesn’t work on my mold?
For persistent molds or porous materials, consider a stronger cleaning method or consult a professional to assess moisture sources and potential remediation needs.
How can I prevent mold after cleaning?
Reduce humidity, fix leaks, improve ventilation, and clean regularly to prevent regrowth.
Is it safe to mix vinegar with bleach for mold cleanup?
No. Mixing vinegar with bleach releases chlorine gas, which is dangerous.
What surfaces should I avoid using vinegar on?
Avoid vinegar on natural stone surfaces like marble and certain limestone tiles, which can etch benchtops and floors.
Buying Guide
When choosing tools and supplies to clean mold with vinegar, consider size, ease of use, and compatibility with surfaces. For most homes, a 16 oz spray bottle provides enough coverage for typical bathroom mold spots and keeps hands from direct contact with the cleaner. A stiff nylon scrub brush is effective on grout and textured areas, while a microfiber cleaning cloth offers gentle yet thorough residue removal. A dedicated grout brush helps target thicker buildup, and a squeegee helps remove moisture from windows and tiles, reducing regrowth opportunities.
Key buying factors include:
– Size and grip: Choose spray bottles that fit comfortably in hand and allow precise spraying.
– Material compatibility: Check surface types to avoid etching on sensitive materials.
– Versatility: A small set that covers spray, scrubbing, wiping, and moisture removal provides a complete mold-cleaning solution.
– Durability: Look for high-quality bristles and a sturdy handle for repeated use.
– Maintenance: Simple cleaning of tools after use extends their life.
Are you looking for a simple, kitchen-table mold-cleaning routine or a more robust bathroom cleanup kit? The right combination of a vinegar spray, a stiff nylon scrub brush, microfiber cloths, and a grout brush, plus a squeegee, can cover most mold scenarios in homes across the United States. Always pair cleaning with moisture control for lasting results.