Non removable insoles can harbor sweat, odors, and bacteria. Proper cleaning extends their life and keeps footwear fresh. This guide outlines a practical, step-by-step method using common shoe-care tools to safely clean insoles without removing them.
Whether you wear sneakers, work boots, or casual shoes, a systematic cleaning approach helps maintain hygiene and comfort. Readers will find a quick overview, a detailed procedural flow, troubleshooting tips, and a buyer’s guide for selecting the right cleaning tools.
Quick Answer
Best first step: wipe down with a damp microfiber cloth, then spot-clean stains with a brush and sponge kit. Allow to air dry completely before wearing again. Use a deodorizer spray with interior brush applicator to control odor between cleanings.
What You’ll Need
- Angled interior shoe cleaning brush for insoles
- Inside shoe cleaning brush and sponge kit
- Microfiber cloth set for cleaning shoe interiors
- Shoe deodorizer spray with interior brush applicator
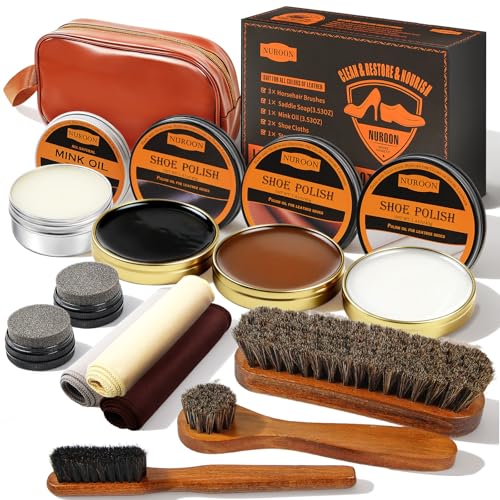
- Shoe cleaning kit with brush sponge and cleaning solution


Before You Start
Before beginning, remove any loose debris from the shoe interior and ensure the shoes are dry enough to avoid mildew. Use gentle motions to prevent abrasion of insole surface. Test any cleaning solution on a small, inconspicuous area first. Time estimates vary by shoe material, but plan for about 15–30 minutes per cleaning session plus an extra hour for thorough drying.
Step-By-Step: How To Clean Non Removable Insoles
- Remove surface debris with a dry, soft-bristled brush to lift dust without embedding particles into fibers.
- Dampen a microfiber cloth with lukewarm water and gently wipe the insole’s top surface to loosen grime.
- Apply a small amount of cleaning solution from the shoe cleaning kit to the angled interior brush for targeted scrubbing of stained areas.
- Use the inside shoe cleaning brush and sponge kit to work the solution into the insole in circular motions, focusing on odor-prone zones.
- Wipe away residue with a clean damp cloth, removing all soap to prevent sticky residues.
- Pat dry with a dry microfiber cloth and allow insoles to air dry completely in a well-ventilated area before wearing again.
- Apply a thin layer of shoe deodorizer spray with interior brush applicator to refresh and inhibit odor buildup between cleanings.
- If odors persist, repeat the cleaning cycle or rotate shoes to reduce moisture and bacterial growth.
Troubleshooting
| Symptom | Likely Cause | Fix | Prevention |
|---|---|---|---|
| Persistent odor after cleaning | Bacteria trapped in fibers | Re-clean with more thorough brushing and apply deodorizer spray | Clean on a regular schedule; allow full drying |
| Streaks or soap residue | Soap left behind | Wipe with clean damp cloth until residue is gone | Rinse cloth frequently; use minimal solution |
| Insole feels stiff after drying | Excess moisture or improper drying | Re-air dry in a breezy area, avoid direct heat | Air-dry completely before use |
| Discoloration on insole | Stains from outdoor debris | Spot-clean with targeted brush and cleaner | Address stains promptly |
Common Mistakes
- Using hot water or strong solvents that can degrade insole materials
- Over-wetting insoles, which slows drying and invites mildew
- Washing insoles while still attached to the shoe, which can damage staples or adhesives
- Relying on deodorant spray alone without cleaning buildup first
Avoid these missteps by sticking to gentle, incremental cleaning and ensuring complete drying after each cleaning cycle.
Tips For Best Results
- Set a regular cleaning routine, such as after a week of heavy use, to prevent buildup.
- Use a microfiber cloth for dirt pickup and minimal moisture to avoid oversaturation.
- Rotate shoes to prevent daily moisture accumulation in one pair.
- Store shoes in a dry, ventilated area to improve drying times between uses.
- Keep the deodorizer spray on hand for quick refresh between full cleanings.
Call A Professional
Seek professional help if insoles show signs of persistent mold, severe staining, or persistent odors despite repeated cleaning. Stop using the shoes if the material is damaged, or if you notice skin irritation after wearing the footwear.
FAQ
Can I remove the insole to clean it more effectively?
Non removable insoles cannot be detached; follow this guide to clean without removal.
Is it safe to use fragrance sprays on insoles?
Use deodorizing sprays formulated for shoe interiors and test on a small area first to avoid discoloration.
How often should I clean non removable insoles?
Clean every 1–2 weeks during heavy use, or as odors and visible grime appear.
What drying method is best?
Air dry in a well-ventilated area away from direct heat or sunlight.
Buying Guide
Choosing the right tools to clean non removable insoles depends on several factors. Consider size and compatibility with your shoe types, noise level if you prefer quiet tools, energy efficiency of any powered devices, control options for precise cleaning, and placement for easy storage. When comparing kits, look for a complete set that includes an angled interior brush, an inside shoe brush and sponge kit, microfiber cloths, and a cleaning solution. A deodorizer spray with interior brush applicator is a valuable addition for ongoing odor control. Evaluate whether the kit offers heat-free drying aids and whether components are easy to replace individually. For households with multiple shoe types, a versatile kit that works across sneakers, boots, and casual footwear provides the best long-term value.