Roomba sensors help guide navigation, map your space, and avoid obstacles. Over time, dust, hair, and smudges can reduce sensing accuracy. This guide provides practical, step-by-step instructions for safely cleaning Roomba sensors using common tools and sensor-specific kits.
Quick Answer
Power down the Roomba, remove loose debris from the exterior, then gently clean each sensor with a soft brush or sensor wipes. Use a dedicated cleaning kit or swabs for LiDAR and visual sensors, and reseat any seals if needed. Test in a small area first to ensure no liquid contact with electronics.
What You’ll Need
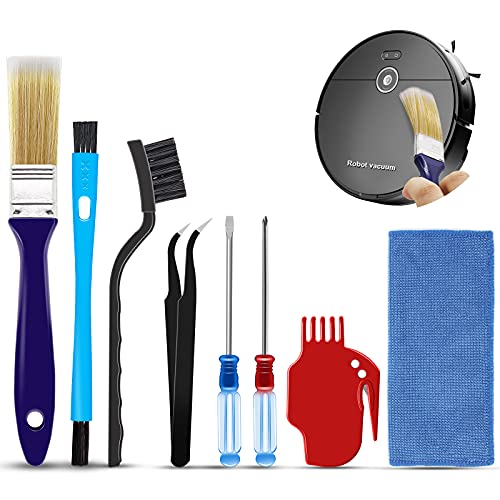
- Roomba sensor cleaning brush
- roomba sensor cleaning kit
- robot vacuum sensor cleaning swabs
- iRobot Roomba sensor wipe pack
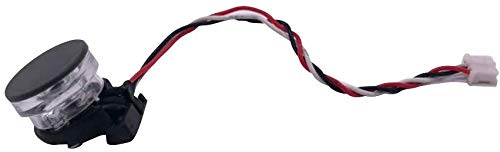
- LiDAR sensor cleaning tool for robot vacuum

Before You Start
Ensure the Roomba is powered off and removed from any charging dock. Work on a clean, dry surface away from liquids. Use soft, non-abrasive tools to avoid scratching sensors. Allow at least 15 minutes for any cleaning steps that involve wipes or swabs. Do not use water directly on sensors and avoid applying cleaners near ports or openings.
Step-By-Step: How To Clean Roomba Sensors
- Power off the Roomba and unplug from any charger to prevent accidental startup.
- Flip the unit over and inspect visible sensors (bumper, cliff sensors, cameras if present, and LiDAR window).
- Use the Roomba sensor cleaning brush to gently brush away hair, dust, and debris from sensor surfaces.
- For stubborn grime, employ the robot vacuum sensor cleaning swabs lightly, avoiding liquid contact with electronics.
- Wipe the LiDAR window with the LiDAR sensor cleaning tool or a dedicated wipe from the kit, using soft strokes from edge to edge.
- Clean camera-like sensors (if your model has them) with a dampened portion of the iRobot Roomba sensor wipe pack and dry with a clean area of the wipe.
- Inspect sensor housings for condensation or moisture and allow any area to dry completely before reassembly.
- Reassemble and place the Roomba on the dock. Run a short cleaning cycle to verify sensors respond correctly.
- If a sensor continues to misread, repeat the cleaning process focusing on the problematic area.
- Store cleaning tools in a dry place and replace wipes as needed for best results.
- Document any unusual sensor behavior and consider a professional service if issues persist.
Troubleshooting
| Symptom | Likely Cause | Fix | Prevention |
|---|---|---|---|
| Roomba struggles to map a room | Dust on LiDAR window | Clean LiDAR window with LiDAR tool | Regular maintenance schedule |
| Cliffs or drop-off errors | Sensors obscured by dust | Clean cliff sensors gently with brush | Avoid placing unit near stair edges during cleaning |
| Cameras blurry or misread | Smudges on camera area | Use sensor wipes on camera surfaces | Keep wipes handy and avoid touching with bare fingers |
| Roomba stops mid-clean | Debris near sensor ports | Clear debris around all sensors | Regular checks after heavy pet shedding or hair growth |
Common Mistakes
- Using too much liquid or soaking wipes near sensors
- Scrubbing sensors with rough tools
- Cleaning without powering down the unit first
- Ignoring dust buildup on the LiDAR window and cliff sensors
Tips For Best Results
- Clean sensors in a well-lit area to spot smudges quickly.
- Match cleaning tools to sensor type—soft brushes for dust, wipes for smudges, and non-abrasive swabs for stubborn grime.
- Schedule sensor maintenance after high-shedding seasons or after carpet installation.
- Test with simple movements to confirm sensors react normally before a full clean run.
Call A Professional
Consider professional service if the Roomba still misreads obstacles, if the LiDAR window is scratched deeply, or if internal sensor electronics show signs of damage. Stop use and contact support when there is visible liquid intrusion, loose components, or unusual noises during operation.
FAQ
How often should I clean Roomba sensors?
Perform a quick sensor check monthly and a thorough cleaning every 1–3 months, depending on usage and environment.
Can I use water to clean the sensors?
Avoid water directly on sensors; use dry or lightly dampened wipes as directed by the cleaning kit.
Which kit is best for LiDAR sensors?
A kit that includes a LiDAR-specific cleaning tool is recommended for consistent results.
What should I do if sensors still misbehave after cleaning?
Power cycle the Roomba, re-test, and if issues persist, contact customer support for diagnostic steps.
Buying Guide
When selecting sensor cleaning accessories, consider compatibility with your Roomba model, sensor type coverage, and ease of use. Key buying factors include size and form factor of tools, whether the kit includes LiDAR-specific components, and the availability of pre-moistened wipes. Look for sets that clearly label the intended sensor surfaces to avoid accidental contact with electronics. A compact cleaning kit is convenient for quick maintenance, while a more comprehensive set helps ensure all sensors remain free of debris for accurate navigation.