Cleaning smoker racks is essential for maintaining consistent heat, preventing flare-ups, and preserving flavors. This guide provides practical, step-by-step methods using commonly available tools and supplies to restore smoker racks to near-new condition.
Whether you’re a weekend griller or a daily user, a well-maintained smoker rack improves airflow and extends the life of your barbecue equipment. The methods below focus on safe handling, effective degreasing, and thorough scrubbing to remove baked-on residue without damaging surfaces.
Quick Answer
Remove racks after cooking, soak them in warm soapy water or a citrus degreaser, scrub with a dedicated grill brush or nylon brush, rinse thoroughly, and dry completely before reinstalling. For stubborn buildup, use a scraper or sponge pads set, then re-season if required.
What You’ll Need
- Stainless steel grill grate scrub brush with scraper
- Barbecue grill cleaning degreaser spray citrus 24 oz
- Nylon bristle BBQ grill brush heavy duty
- Grill grate cleaning kit wire brush scraper
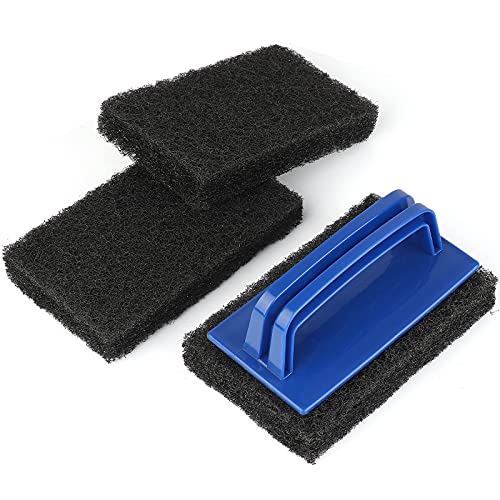
- Barbecue grill grate cleaning sponge pads set


Before You Start
Prepare a clean workspace and gather the tools listed above. Wear gloves to protect hands from sharp edges and hot surfaces. Protect the surrounding area from splashes by anchoring the rack with tongs or a heat-safe rack. Plan for a time window of about 30–60 minutes, depending on buildup. Crucial cautions: avoid using abrasive cleaners on coated racks, and never soak electrical components. Ensure racks are fully cooled before handling to prevent burns.
Step-By-Step: How To Clean Smoker Racks Effectively
- Remove the smoker racks from the grill and place them on a stable surface.
- Brush loose debris with a dry nylon bristle brush to lift burnt-on residue without scratching metal.
- Prepare a cleaning solution by mixing warm water with a citrus-based degreaser spray or your preferred degreaser.
- Soak the racks in the solution for 15–20 minutes to loosen grease and char buildup.
- Agitate with a scrub brush or the included scraper in the kit to free stubborn matter.
- Rinse thoroughly with warm water, paying attention to gaps between bars where residue hides.
- Use sponge pads to wipe down any remaining grime, especially on flat surfaces or broad grates.
- Inspect for remaining buildup; repeat soaking and scrubbing if necessary.
- Dry the racks completely with a towel or air dry before reinstalling to prevent rust.
- Reinstall racks and run the grill on medium heat for 5–10 minutes to burn off any residual cleaner.
- Optionally apply a thin coating of oil on the rack surfaces to inhibit future sticking and rust.
- Store cleaning tools in a dry place for next use and keep a spare set of sponge pads for future sessions.
Troubleshooting
| Symptom | Likely Cause | Fix | Prevention |
|---|---|---|---|
| Grease remains after washing | Insufficient soaking time | Soak longer or reapply degreaser and scrub | Clean grills soon after use to reduce buildup |
| Rust spots appear | Racks are old or exposed to moisture | Use rust remover suitable for grills or replace | Dry thoroughly after cleaning; store in dry area |
| Streaks on metal | Residue from cleaner | Rinse with clean water and wipe dry | Follow manufacturer guidelines for cleaners |
| Discoloration on coated racks | Harsh abrasive tools | Switch to soft brushes and sponge pads | Avoid metal scrapers on coated surfaces |
Common Mistakes
- Using steel wool or harsh abrasives on coated surfaces, which can scratch and peel coatings.
- Skipping the drying step, leading to rust formation.
- Over-soaking stainless steel racks which can cause pitting or moisture entrapment.
- Neglecting to rinse off degreaser completely, leaving chemical residues on food surfaces.
Tips For Best Results
- Schedule routine cleanings after heavy grilling days to prevent extreme buildup.
- Use a dedicated grill brush with a scraper for built-up residues and tight corners.
- For persistent grime, apply a citrus degreaser and let it dwell briefly before scrubbing.
- Keep spare sponge pads handy for faster cleanup during maintenance sessions.
- Regularly inspect racks for wear and replace as needed to maintain safe cooking surfaces.
Call A Professional
Consider contacting a professional if racks show deep rusting that compromises safety, warping that affects airflow, or if removal of stubborn residues requires specialized equipment. Stop using the grill if there is severe corrosion, cracks, or if cleaning requires solvents beyond household degreasers.
FAQ
What should I use to clean stainless steel smoker racks?
Use a mild citrus-based degreaser spray and a nylon or stainless steel scrub brush to remove grime without scratching the surface.
Can I soak smoker racks overnight?
Yes, but avoid long soaks on coated surfaces; check manufacturer guidance and ensure racks dry completely before reuse.
Is it okay to use dishwasher for grill racks?
Only if the racks are labeled dishwasher-safe and designed to withstand high temperatures; otherwise, hand washing is recommended.
How do I prevent rust after cleaning?
Dry racks completely, store in a dry area, and consider a light oil coating to inhibit moisture exposure.
How often should I clean smoker racks?
Clean after every few uses or once buildup becomes noticeable to maintain performance and flavor.
Buying Guide
Choosing the right cleaning accessories for smoker racks depends on several factors. Size matters: ensure tools fit your grill’s rack dimensions and spacing. Noise level is generally a minor concern but consider manual vs. powered options if you prefer quick work, especially for larger grills. Energy efficiency is less critical for cleaning tools but selecting durable, reusable items reduces waste. Controls refer to the ease of use of brushes, scrapers, and spray degreasers; opt for ergonomic handles and secure attachments. Placement considerations include a clean, ventilated work area and a dedicated space to dry racks after cleaning. When comparing products, look for compatibility with stainless steel racks, rust resistance, and kit completeness. Do you want a single brush, or a complete kit that includes sponge pads and a scraper? A balanced kit can simplify maintenance and extend the life of your grill.