Vinyl shower floors offer a comfortable, low-maintenance surface, but they still require a thoughtful cleaning routine to prevent soap scum, mold, and mineral buildup. This guide provides practical, step-by-step methods using common cleaning tools to restore shine and maintain a fresh bathroom floor.
By following the methods below, homeowners can keep vinyl shower floors looking new with safe products and minimal effort, avoiding damage to seams and grout along the way.
Quick Answer
Best for routine cleaning: A gentle scrub with a stiff bristle scrub brush for vinyl shower floor cleaning or a non-scratch silicone scrub pad, followed by a microfiber squeegee to remove excess water. For tough stains: A steam cleaner for bathroom vinyl shower floor can loosen grime without harsh abrasives. Always test a small area first.
What You’ll Need
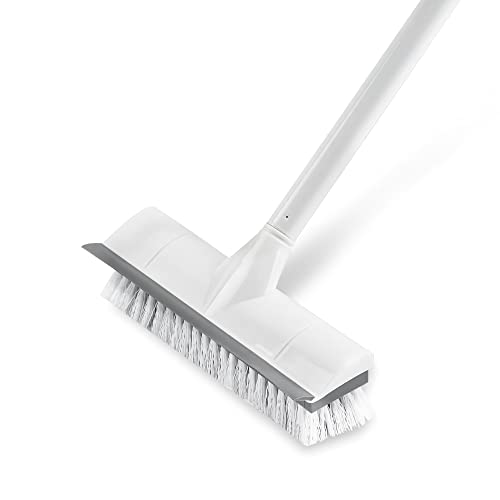
- Stiff bristle scrub brush for vinyl shower floor cleaning
- Angled grout brush for vinyl shower floor
- Steam cleaner for bathroom vinyl shower floor
- Microfiber squeegee for shower floor cleaning
- Non-scratch silicone scrub pad for vinyl shower floor
- All-purpose bathroom cleaner or a mild detergent
- White vinegar or baking soda for mineral deposits


Before You Start
Before cleaning, ensure the bathroom is well-ventilated. Move any loose items from the floor and protect bathroom surfaces around the shower. Test any cleaner on a small, inconspicuous area to verify it won’t discolor or damage the vinyl. Time estimate for a typical cleaning session is 15–30 minutes, depending on buildup. Never mix cleaners with bleach or ammonia. For textured vinyl floors or stubborn stains, allow cleaners to dwell for a few minutes before scrubbing.
Step-By-Step: How To Clean Vinyl Shower Floor
- Remove standing water with the microfiber squeegee for shower floor cleaning to reveal the full surface and identify spots that need extra attention.
- Apply a mild bathroom cleaner or a solution of white vinegar and water to the floor, concentrating on areas with soap scum or mineral deposits.
- Let the solution sit for 5–10 minutes, then use the stiff bristle scrub brush for vinyl shower floor cleaning to agitate the surface without scratching the vinyl.
- Switch to an angled grout brush for vinyl shower floor to target grout lines and any textured sections where grime hides.
- For stubborn stains, sprinkle a small amount of baking soda on the floor, then scrub with the scrub brush or non-scratch silicone scrub pad for vinyl shower floor.
- If available, use a steam cleaner for bathroom vinyl shower floor on a low setting to lift residue and sanitize without harsh chemicals. Keep steam away from seams and edges as needed.
- Rinse thoroughly with clean water, ensuring all cleaner residues are removed from the vinyl surface.
- Finish by drying the floor with the microfiber squeegee for shower floor cleaning to prevent streaks and water spots and to reduce mold risk.
Troubleshooting
| Symptom | Likely Cause | Fix | Prevention |
|---|---|---|---|
| Streaks or dull finish | Residue left from cleaner | Rinse thoroughly, repeat with a vinegar rinse | Use minimal cleaners and rinse well |
| Persistent soap scum | Hard water deposits | Apply baking soda paste and scrub with stiff bristle brush | Dry floor after each use |
| Moldy grout lines | Moist, porous grout | Scrub grout with angled grout brush and treat with a diluted bleach solution if safe for vinyl | Maintain ventilation and quick drying |
| Scratches or dull spots | Overly aggressive scrubbing | Switch to non-scratch silicone scrub pad; avoid metal tools | Use soft pads for regular cleaning |
Common Mistakes
- Using abrasive cleaning tools on vinyl surfaces
- Over-wetting the floor, which can seep into seams
- Using bleach or ammonia-based cleaners on colored vinyl
- Neglecting to dry the floor after cleaning, which promotes mold growth
Tips For Best Results
- Establish a weekly quick clean using a microfiber squeegee and a mild cleaner to prevent buildup.
- Rotate pressure between a stiff bristle scrub brush and a non-scratch silicone scrub pad to protect the vinyl while keeping it clean.
- For mineral deposits, apply a vinegar solution before scrubbing; the acidity helps dissolve scale without harsh chemicals.
- Test steam cleaning on a hidden corner first to confirm compatibility with your vinyl flooring and avoid warping.
Call A Professional
Consider contacting a pro if the vinyl shows widespread discoloration, persistent mold behind grout, or if there are signs of water damage. Stop cleaning and seek help if you notice softened seams, bubbling vinyl, or strong odors that indicate underlying issues requiring expert assessment.
FAQ
Can I use bleach on vinyl shower floors?
Bleach should be avoided on colored vinyl and applied with caution on white vinyl, ensuring thorough rinsing to prevent damage.
Is steam cleaning safe for vinyl shower floors?
Steam can be effective but should be used on low settings and tested on a small area first to avoid damage to seams or adhesive.
How often should I clean my vinyl shower floor?
Weekly cleaning with a quick rinse and dry, plus a deeper scrub every 1–2 weeks depending on usage and water hardness.
What if mold keeps returning after cleaning?
Address moisture issues, improve ventilation, and consider using a mold-resistant cleaner on grout lines.
Can I use a regular bathroom tile brush on vinyl?
Prefer tools labeled for vinyl to prevent scratches; use soft or non-scratch alternatives for routine care.
Should I seal vinyl floors?
Vinyl floors do not require sealing; regular cleaning and drying are sufficient to maintain their appearance and longevity.
Buying Guide
When choosing cleaning tools for a vinyl shower floor, buyers should consider size, design, and material compatibility. For example, a stiff bristle scrub brush for vinyl shower floor cleaning is ideal for tough buildup, while a non-scratch silicone scrub pad for vinyl shower floor protects delicate surfaces during routine scrubbing. A steam cleaner for bathroom vinyl shower floor offers powerful sanitization, but test compatibility with your floor type and grout. A microfiber squeegee for shower floor cleaning helps remove water quickly and reduces mold risk, supporting a quick-dry routine. An angled grout brush is valuable for stubborn grout lines, but ensure it won’t dull the vinyl edge. Consider storage space, ease of use, and whether tools are dishwasher-safe or easy to rinse. For households with hard water, choosing gentle cleaners and an efficient rinse process becomes especially important to prevent mineral buildup.
Size matters: larger brushes cover more area but can be unwieldy in tight showers. Noise is minimal with most brushes, but steam cleaners can be louder; check product specs. Energy efficiency applies mainly to steam cleaners and should be balanced with cleaning frequency. Controls should be straightforward, especially for casual cleaners. Placement considerations include easy access to storage, proximity to water sources, and avoiding damp, dark areas that encourage mold.
In practice, most bathrooms benefit from a simple kit: a stiff bristle brush for tough grime, a silicone scrub pad for routine care, a grout brush for lines, a microfiber squeegee for drying, and a steam option for deep cleaning when needed. By selecting a cohesive set that targets the vinyl floor and grout, homeowners can achieve a clean, hygienic shower with less effort and more confidence.