Cleaning tub grout keeps bathrooms looking fresh and prevents mold and mildew from taking hold. This guide covers practical methods, choosing the right tools, and steps you can follow to restore grout to a bright, clean finish without damaging surrounding tiles.
Readers will learn how to tackle common grout stains in bathtubs, from everyday soap scum to heavy mildew buildup, using tools and products suitable for American homes and typical bathroom layouts.
Quick Answer
Best overall approach: Start with a gentle scrub using a stiff nylon grout brush to loosen dirt, then switch to a steam cleaner for deep sanitizing or a rotating grout brush for stubborn areas. Finish with a grout stain remover powder if needed, and seal the grout with a pen sealer after drying for long-lasting protection.
What You’ll Need
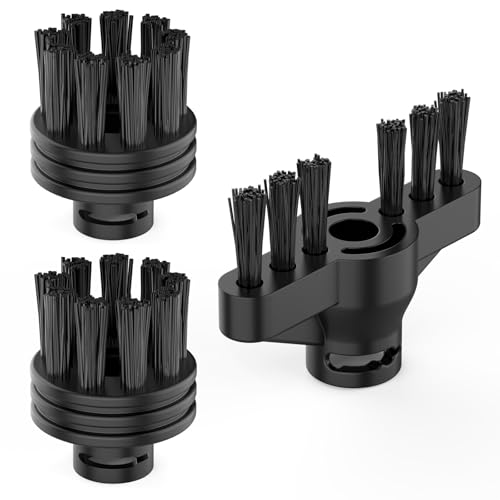
- Grout cleaning brush stiff nylon bathroom tub
- Steam cleaner for grout in bathroom tiles
- Rotating grout brush electric for tub grout cleaning
- Grout stain remover powder for bathroom grout tub
- Grout sealer pen for bathroom tile grout after cleaning


Before You Start
Prepare the workspace by removing toiletries and placing towels to catch drips. Ventilate the bathroom to minimize fumes from cleaners. Test any product on a small, inconspicuous area of grout first to ensure there is no discoloration or damage. Time estimates: plan 60–90 minutes for initial cleaning, plus drying time for sealers.
Cautions: Avoid acidic cleaners on natural stone or untreated grout, as they can etch grout and tile. Do not mix household cleaners, especially bleach and ammonia, which can create dangerous fumes. Wear gloves and eye protection when handling powders or concentrated cleaners.
Step-By-Step: How To Clean Tub Grout
- Inspect grout lines for cracks or loose sections; mark areas that may need resealing after cleaning.
- Dry the area briefly to gauge where stains are most persistent and to avoid diluted cleaning solutions spreading.
- Apply a grout-safe cleaner or paste along the grout lines and let it sit for 5–10 minutes to break up grime.
- Use the stiff nylon bathroom tub grout brush to scrub vertical and horizontal grout lines with firm, even pressure.
- For tougher staining, switch to the rotating grout brush electric for a thorough, even scrub without overworking a single spot.
- Rinse with warm water and inspect; repeat scrubbing on remaining stubborn lines as needed.
- Dry the surface completely and assess if any grout color remains darker than surrounding areas.
- If stains persist, mix a grout stain remover powder into a paste and apply to the affected lines; let sit as directed, then scrub and rinse.
- Allow grout to dry fully, then apply the grout sealer pen for bathroom tile grout after cleaning, following the product’s instructions for best coverage and curing time.
- Reassess after sealer cures; reapply sealer to high-traffic areas or zones near the tub edges as needed.
- Clean up tools, wash hands, and replace items to ensure the tub area is dry and safe before use.
- Schedule periodic maintenance cleanings to keep grout pristine and to prevent mold recurrences.
Troubleshooting
| Symptom | Likely Cause | Fix | Prevention |
|---|---|---|---|
| Stains return after cleaning | Porous grout absorbing stains | Apply grout stain remover powder and re-seal | Seal grout after each deep clean; use water-based cleaners |
| Mildew reappears quickly | Inadequate ventilation or moisture buildup | Improve bathroom ventilation; run exhaust fan during and after showers | Keep bathroom dry; wipe down after use |
| Discoloration near tiles | Harsh cleaner on grout or tile damage | Switch to milder, grout-safe cleaners; avoid acidic solutions | Test cleaners first; follow manufacturer guidelines |
| Cracked or chipped grout after cleaning | Aged or damaged grout | Repair damaged sections and reseal | Inspect grout periodically; perform timely repairs |
Common Mistakes
- Using overly abrasive brushes that wear down grout instead of cleaning it.
- Ignoring safety, such as lacking ventilation or proper PPE when handling powders.
- Rushing the sealing step; applying sealer on damp grout can trap moisture.
- Relying on a single cleaning method for all stains; some cases require stain remover powder or steam.
Taking a methodical approach helps prevent reoccurring issues and keeps grout looking bright longer.
Tips For Best Results
- Work in small sections to ensure cleaning products stay on grout long enough to act.
- Use heat and steam for deeper sanitizing in damp bathroom environments.
- Always dry grout thoroughly before applying sealer for optimal adhesion.
- Consider a routine maintenance schedule, cleaning grout monthly or quarterly depending on usage.
Call A Professional
Stop and call a pro if grout is crumbling, you observe extensive tile damage, or mold growth persists after multiple cleaning attempts. Seek a licensed technician for advanced mold remediation or structural grout repairs, especially in commercial-grade bathrooms or areas with frequent water exposure.
FAQ
What is the best way to clean tub grout without damaging tiles?
Use a stiff nylon grout brush with a grout-safe cleaner, then rinse and dry thoroughly. For stubborn stains, apply a grout stain remover powder following the product directions.
How often should grout be sealed after cleaning?
Seal once clean and dry, then re-seal every 1–3 years depending on wear and moisture exposure.
Can I use bleach on tub grout?
Bleach can be effective for mildew but may weaken grout over time; use a diluted solution and ensure good ventilation, or choose a dedicated grout cleaner.
Is steam cleaning safe for grout?
Yes, steam cleaners can sanitize grout and remove grime, but avoid excessive heat or moisture on damaged grout or heavily cracked lines.
What should I do if grout is permanently stained?
Permanent stains may require grout replacement or professional restoration for uniform appearance.
Are there alternatives to a grout sealer pen?
Yes, silicone-based sealers or spray sealers can be alternatives, but pens offer precise application on vertical lines with less mess.
Buying Guide
When selecting tools and products to clean tub grout, consider size and layout of the bathroom, grout type, and the level of staining. Key buying factors include:
- Grout cleaning tools: A stiff nylon brush is essential for physical scrubbing on tub grout, while a rotating electric grout brush helps with heavy buildup in larger areas.
- Steam cleaners: Useful for sanitizing and loosening grime without harsh chemicals, especially in high-moisture bathrooms.
- Grout stain remover powder: Helpful for persistent stains; ensure it is compatible with your grout type and tile material.
- Grout sealer: A pen or spray sealer protects cleaned grout from moisture ingress; reapplication timing depends on use and cleaning frequency.
- Surface safety: Look for products labeled grout-safe and tile-safe to prevent damage to bathtub surrounds and tile surfaces.
- Noise and energy considerations: Rotating brushes and steam cleaners vary in noise; consider models with lower decibels and energy-efficient operation.
- Placement and ease of use: For tub edges, a compact steam cleaner or handheld grout brush can simplify access in tight corners.
Consider a kit that combines a dedicated grout brush, a compatible stain remover, and an easy-to-use sealer for streamlined maintenance. If you’re unsure about grout type or tile backing, consult the manufacturer’s guidelines or a bathroom remodeling professional to prevent damage and ensure a uniform finish.