Cleaning makeup brushes regularly helps maintain makeup hygiene and prolongs brush life. Dish soap is a simple, accessible option that effectively breaks down oils and residues. This guide covers practical methods and tools to keep brushes clean, safe for skin, and ready for everyday use.
While many pros use specialized cleaners, a mild dish soap paired with thorough rinsing can achieve excellent results for most synthetic and natural-bristle brushes. The following sections provide a clear, step-by-step process and practical tips to avoid damage and over-washing.
Quick Answer
Fast method: Rinse brush bristles under lukewarm water, apply a small drop of dish soap, work into a lather in the palm, rinse until clear, then reshape and lay flat to dry. For deeper cleaning, repeat once, and for stubborn buildup try a gentle agitation with a silicone cleaning tool or a dedicated silicone brush cleaning mat.
What You’ll Need
- Bowl or sink with lukewarm water
- Dish soap (mild, fragrance-free preferred)
- Clean towel or microfiber cloth
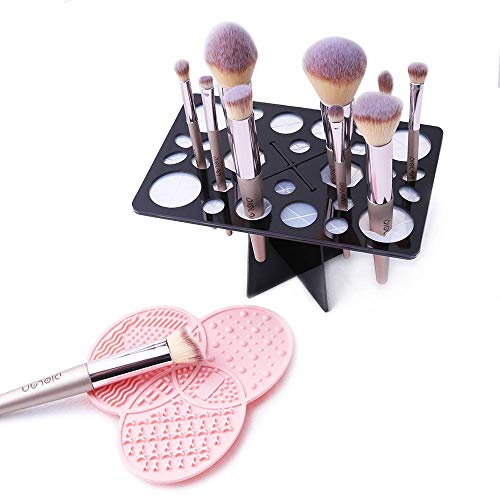
- Silicone makeup brush cleaning mat
- Makeup brush cleansing glove silicone
- Silicone brush cleaning tray mat for makeup brushes
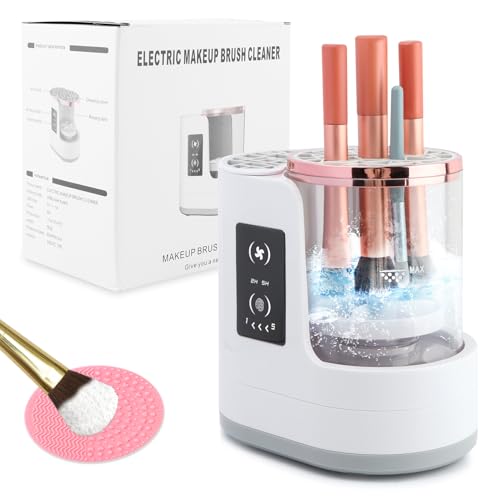
- Ultrasonic makeup brush cleaner device (optional for deeper clean)
- Makeup brush cleaning mat with handle

Before You Start
Assess brush types: synthetic bristles tolerate dish soap well; natural bristles may require gentler handling and shorter washing cycles. Always test a small area if uncertain about color-cleaning pigments. Work over a soft towel to catch any drips, and lay brushes flat to dry to preserve bristle shape. Avoid soaking brush handles for long periods to prevent loosening glue. Plan about 15–25 minutes per full clean, depending on the number of brushes.
Step-By-Step: How To Clean Makeup Brushes With Dish Soap
- Remove excess makeup by gently tapping the brush on the back of your hand or a clean cloth.
- Fill a bowl with lukewarm water and add a small amount of mild dish soap. Swirl to create a gentle suds.
- Dip the brush bristles into the soapy water, avoiding the ferrule where possible. Move the brush in small circular motions against the palm or a cleaning mat.
- Rinse bristles under lukewarm running water, keeping the brush at an angle so water flows away from the ferrule. Check for pigment removal; repeat if needed.
- For stubborn stains, work a second quick lather using a silicone makeup brush cleaning mat or a cleansing glove silicone to boost agitation without excessive force.
- Gently squeeze out excess water with a clean towel. Reshape bristles to their original forms.
- Lay brushes flat on a towel or use a vertical stand to air-dry. Ensure bristles point downward to prevent water from seeping into the ferrule.
- For routine maintenance, repeat every 1–2 weeks for frequent users; deeper cleaning can be done every 1–2 months depending on usage.
Troubleshooting
| Symptom | Likely Cause | Fix | Prevention |
|---|---|---|---|
| Residual color after washing | Insufficient rinsing | Rinse until water runs clear | Rinse twice and use a cleaning mat for agitation |
| Brush bristles fraying | Over-agitation or soaking | Use gentle circular motions; avoid soaking bristles | Limit exposure time; dry properly |
| Stiff, misshapen bristles | Over-drying or heat exposure | Reshape while damp and air dry away from heat | Dry flat or with bristles hanging down |
| Strong soap scent | Too much soap or insufficient rinsing | Use less soap, rinse thoroughly | Rinse thoroughly after each wash |
| Water seepage into handle | Soaking the ferrule | Avoid soaking and protect ferrule | Keep handle dry during washing |
Common Mistakes
- Using hot water that damages bristles
- Over-soaking brushes, especially near the ferrule
- Rubbing bristles harshly against surfaces
- Neglecting to reshape brushes after washing
- Skipping complete rinsing, leaving soap residue
To minimize issues, rinse with lukewarm water, use gentle motions, and keep the ferrule dry. Consider using a dedicated silicone cleaning tool to reduce effort on tougher stains with minimal bristle stress.
Tips For Best Results
- Clean brushes weekly if they’re used daily with liquid products; monthly for occasional users.
- Spot-clean brushes between full washes by wiping bristles with a damp cloth and a drop of dish soap on the cloth.
- For denser makeup, a silicone brush cleaning mat with handle offers better control and airflow during drying.
- Store brushes with bristles facing downward or lying flat to prevent moisture from creeping into the handle.
Call A Professional
Contact a professional cosmetic tool technician or brush manufacturer if brushes show persistent shedding, become deformed beyond repair, or if expensive natural-bristle brushes lose their shape after multiple cleanings. Seek help immediately if you notice any cracking, discoloration, or bristle separation near the ferrule.
FAQ
Can I use dish soap on natural-bristle brushes?
Yes, but use a mild soap and avoid harsh scrubbing to protect delicate natural fibers.
How often should I deep-clean makeup brushes with dish soap?
For frequent daily use, deep-clean every 1–2 weeks; for light use, every 1–2 months is typically sufficient.
Is an ultrasonic cleaner necessary for cleaning brushes?
Not required, but an ultrasonic device can help remove stubborn residue and save time on larger brush sets.
How should brushes be dried after washing?
Lay flat on a towel or hang bristles downward to air-dry completely, preventing water from entering the handle.
Can I clean silicone tools with the brushes?
Yes, silicone cleaning mats and glove tools can be used alongside dish soap to gently agitate and lift makeup from bristles.
What if color bleeds onto the brush bristles?
Rinse thoroughly and repeat with fresh water and soap; consider using a dedicated cleaning tool to help dislodge pigment.
Buying Guide
Key buying factors for dish-soap cleaning routines include brush size, bristle material, and drying options. Consider multiple perspectives to optimize results:
- Size and variety: A set with a range of brush sizes helps cover eyes, face, and detail work. Larger brushes benefit from more thorough cleaning cycles.
- Cleaning mats and tools: Silicone brush cleaning mats, cleansing gloves, and tray mats with handles provide better lathering and control, reducing wear on bristles.
- Drying options: A drying rack with downward-facing bristles prevents water from seeping into the ferrule and speeds up drying time.
- Ease of use: User-friendly tools save time and reduce the risk of bristle damage during routine cleaning.
- Durability: Durable silicone tools stand up to repeated washings and keep their shape and grip over time.
- Allergen considerations: If sensitive skin is a concern, choose fragrance-free dish soaps and gentle mats or gloves designed for cosmetic use.
When selecting products, think about how often you wash brushes and the types of makeup you apply. A combination of a silicone cleaning mat, a cleansing glove, and a reliable ultrasonic unit can provide a comprehensive approach that balances efficiency with brush longevity. Are you ready to assemble a practical kit that fits your routine?